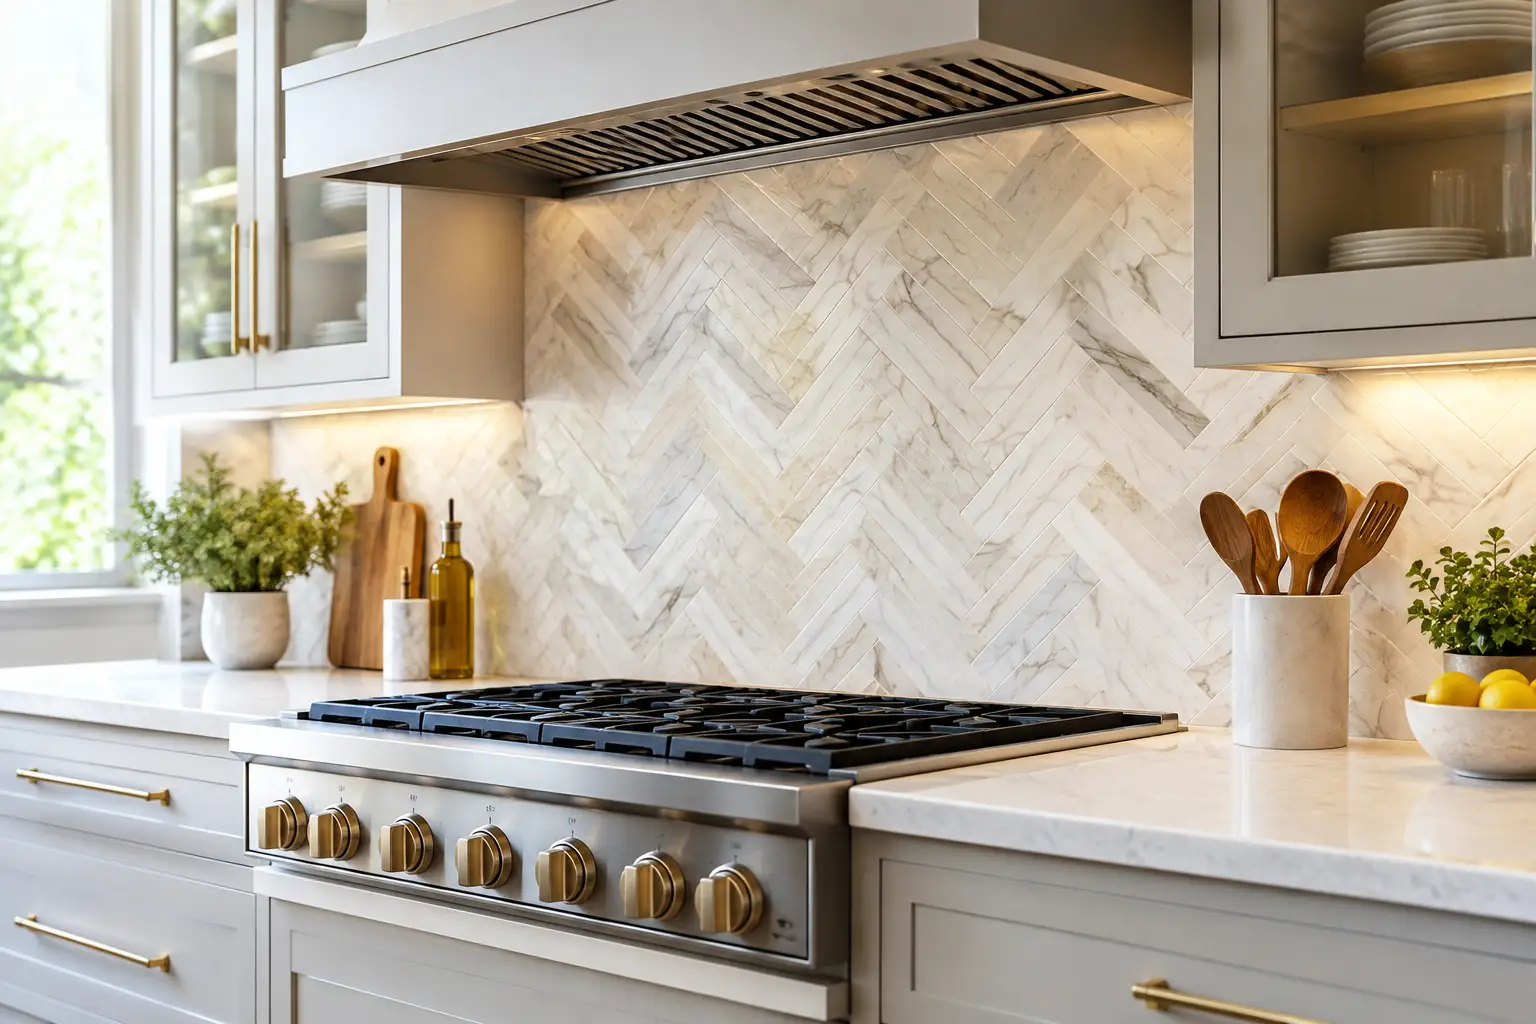
Luxury Kitchen Splashback Tiling Example
A luxury kitchen splashback tiling example is rarely defined by the tile alone. The difference between a kitchen that feels considered and one that merely looks new sits in the alignment of every cut, the depth of the grout joint, the way the finish meets the benchtop, and how the surface performs after years of cooking.
For a premium kitchen, the splashback is a small area with an outsized visual role. It frames the cooktop, catches the natural light, and often becomes the one detail that gives cabinetry and stone a stronger sense of character. Getting it right calls for design awareness, exact preparation and disciplined installation.
What Makes a Splashback Feel Luxurious?
Luxury is not always about selecting the most expensive material. A handmade-look ceramic tile can feel more refined than a large-format imported slab if it has been specified in proportion to the room and installed with care. Equally, a beautiful natural stone can lose its impact when poorly supported, unevenly set or finished with bulky silicone lines.
A high-end result relies on visual restraint. The splashback should work with the cabinetry, benchtop, tapware and lighting rather than compete with all of them. In a kitchen with strongly veined stone, for example, a quieter handmade tile in a warm white or soft mineral tone may provide balance. Where cabinetry is simple and architectural, a richly textured or patterned tile can carry the design.
Precision is what allows the material to speak for itself. Straight datum lines, consistent joint widths and thoughtfully placed cuts create calm. They also avoid the familiar signs of rushed work: narrow slivers at the end of a run, lipped tiles around power points, and grout lines that wander as they approach a corner.
Luxury Kitchen Splashback Tiling Example: Fluted Marble Mosaic
Picture a kitchen with deep walnut veneer joinery, pale quartzite benchtops and brushed brass tapware. Instead of continuing the quartzite up the wall, the designer selects a fluted marble mosaic in a soft ivory tone. The tile runs from benchtop to underside of the wall cabinets, wrapping neatly behind the cooktop and finishing with a clean return at an open shelf.
This is a compelling luxury kitchen splashback tiling example because the surface has movement without visual noise. The fine vertical fluting adds shadow and texture throughout the day, while the restrained colour keeps attention on the craftsmanship of the material. A grout colour matched closely to the stone prevents the mosaic from becoming grid-like or busy.
The installation, however, is more demanding than it appears. Natural stone mosaics must be assessed before fixing so sheets are blended for tone and veining. The wall must be flat enough to prevent the texture from amplifying minor undulations. Adhesive coverage needs to be consistent, particularly behind pieces with a relief profile, and the delicate edges around outlets require careful cutting rather than rough notching.
The final detail at the benchtop matters just as much. A fine, colour-matched flexible sealant joint allows for movement between wall and joinery while maintaining an elegant finish. It should look intentional, not like an afterthought applied to hide an uneven gap.
Why the layout matters
With fluted mosaics, a central set-out is often the strongest approach. Starting from the cooktop centreline means the vertical pattern reads symmetrically where the eye naturally lands. The installer can then manage the cuts at either side, concealing smaller adjustments beneath cupboards or near less prominent returns.
That rule is not absolute. In some kitchens, a window, shelf or tall pantry creates a more important visual line than the cooktop. The best set-out is decided on site, after the cabinetry, stone and fixtures are measured and the tile layout is reviewed against the whole elevation.
Material Choices and the Trade-Offs Behind Them
Every premium splashback material asks something different of the installation and the owner. Ceramic and porcelain are versatile choices, offering dependable performance and an extensive range of glazes, formats and textures. Glossy handmade-effect tiles reflect light beautifully, but their intentional variation means joint spacing and level changes must be managed with judgement rather than forced into rigid uniformity.
Natural stone has a depth that manufactured products cannot fully replicate. Marble, limestone and onyx can create an exceptional statement, particularly when bookmatched or carried into a shelf detail. They also require more care. Some stones are porous, can react to acidic spills and may need sealing at appropriate intervals. A kitchen that sees heavy daily use may be better served by porcelain with a convincing stone appearance, especially around a busy cooktop.
Large-format porcelain or sintered surfaces create a near-jointless look. This can suit minimal kitchens where the goal is uninterrupted planes and a clean architectural finish. Yet fewer grout lines do not mean less skill. Large pieces demand accurate wall preparation, safe handling, purpose-made cutting equipment and careful planning around outlet locations. One poorly positioned cut can compromise an otherwise striking slab effect.
Metallic, mirrored and glass tiles introduce light and glamour, but they reveal installation flaws quickly. Their substrates must be suitable, their edges protected, and their cleaning requirements considered before selection. Beauty is only useful when it remains practical for the way the kitchen will be lived in.
Preparation Is the Invisible Part of Perfection
Splashback tiling begins well before the first tile is fixed. Existing finishes may need removal, and the wall beneath must be inspected for hollows, cracking, moisture damage or unevenness. Even a slight dip can become obvious under a glossy tile or along the edge of a large-format panel.
For premium projects, the wall is assessed against the chosen finish rather than treated as a generic background surface. Small mosaics can accommodate gentle variation more easily than large porcelain pieces. Rectified tiles with narrow grout joints need a particularly flat substrate. Where necessary, re-levelling work creates the true plane required for crisp results.
Coordination with other trades is equally important. Electrical outlets, rangehoods, shelves and cabinetry all affect the tile layout. Power points placed without regard for the pattern can interrupt a feature tile at the most visible point. Resolving those details early protects both the appearance and the programme.
In areas exposed to regular water, such as a splashback behind a sink, appropriate surface preparation and compatible materials protect the wall system. The exact scope depends on the construction and local requirements, but shortcuts beneath the finish are never a luxury.
The Finishing Details Clients Notice First
A polished splashback is recognised in the close-up details. Grout should complement the tile, not simply be selected from a standard chart. A near-match can create a quiet, monolithic surface, while a contrasting grout can draw out geometry in a herringbone or finger-tile pattern. The choice depends on whether the aim is texture or calm.
Edges deserve similar attention. Exposed tile ends can be mitred, finished with a slim profile, returned into a wall or terminated beneath joinery. There is no single premium solution. A brass trim may echo the tapware in one project, while a mitred stone edge is more appropriate in another. What matters is that the termination looks designed rather than improvised.
Caulking should be neat, colour-considered and confined to movement joints. Excessively wide sealant lines can cheapen even the finest tile. Fine joints, clean transitions and properly polished cuts are quiet details, but they are where lasting workmanship is proven.
Choosing the Right Installation Partner
A luxury splashback should be priced as a precision scope, not measured as a simple square-metre exercise. Complex materials, feature layouts, outlet cuts, niche returns and access conditions all affect the work required. Clear quoting should account for preparation, fixing systems, grout, sealing where required and finishing details, so there are no surprises once the kitchen is ready for installation.
At Perfectly Laid, that process is centred on the complete outcome: reviewing the substrate, establishing the layout, protecting adjoining finishes and delivering the detail that the design demands. For homeowners, builders and project managers, this approach brings confidence that the final surface will look as good at close range as it does in the initial concept.
The most successful splashbacks do not shout for attention simply because they are expensive. They reward a closer look – a perfectly centred pattern, a considered transition, a surface that feels composed from every angle. Choose a material you will enjoy living with, then give it the preparation and precision it deserves.