How to Remove Tile Adhesive Without Damage
The last tile has come away, but the hard part is often still on the wall or floor. Knowing how to remove tile adhesive without damaging the surface beneath is what separates a clean renovation from a costly repair. Work too aggressively and you can tear plasterboard paper, break up a screed, gouge concrete or compromise waterproofing that should have remained untouched.
The right method depends on the adhesive, the substrate and what is planned next. A bathroom being retiled demands a different level of care from a utility-room floor receiving vinyl, while an original solid wall can tolerate more mechanical removal than a lightweight partition. The aim is not simply to make the surface look clean. It is to leave it sound, flat and properly prepared for the next finish.
Identify the adhesive before you start
Tile adhesive is not one material. Older cement-based adhesive is usually hard, grey and stubborn. It is commonly found beneath floor tiles and wall tiles in wet areas, and often requires mechanical removal. Ready-mixed wall adhesive can be softer, cream or white in colour, and may soften with warm water or a suitable adhesive remover.
A small test area tells you more than appearances alone. Use a scraper or chisel at a shallow angle and see whether the material flakes, powders, smears or remains firmly bonded. Do not assume that a chemical remover will solve every problem. It may help with light residues, but it will not replace controlled mechanical preparation where cement-based adhesive has been laid thickly.
The substrate matters just as much. Concrete and sound sand-cement screed can generally withstand more effort than plaster, plasterboard, fibre-cement sheeting or waterproofed walls. If the surface flexes, sounds hollow or sheds material during your test, stop and reassess before making the damage harder to repair.
How to remove tile adhesive from walls
Wall adhesive needs patience. The temptation is to use a sharp chisel at a steep angle and force it off quickly. That approach can leave deep scars that then need patching, levelling and drying time before any new tiles can be installed.
Begin with a broad scraper, keeping the blade as flat to the wall as possible. Work across the adhesive rather than directly into the substrate. For softer ready-mixed adhesive, apply warm water sparingly with a sponge, allow it to sit briefly, then scrape again. Avoid soaking plasterboard or plaster walls. Moisture can weaken the face paper, swell boards and create a bigger repair than the adhesive itself.
For hard cementitious adhesive, a multi-tool fitted with a rigid scraping blade can help on small areas. On solid masonry walls, an SDS drill with a wide chisel may be appropriate, but only with a light touch and the tool held almost parallel to the surface. The objective is to shear adhesive from the wall, not dig into it.
Plasterboard is the critical exception. If cement adhesive is strongly bonded to the board, full removal is rarely the most efficient or reliable choice. Cutting out and replacing the affected lining can produce a flatter, stronger result, particularly in bathrooms and kitchens where the new tile finish deserves a stable base. In wet zones, any damaged board or waterproofing system should be reinstated as part of a complete, compliant preparation process.
Removing adhesive from concrete and screeded floors
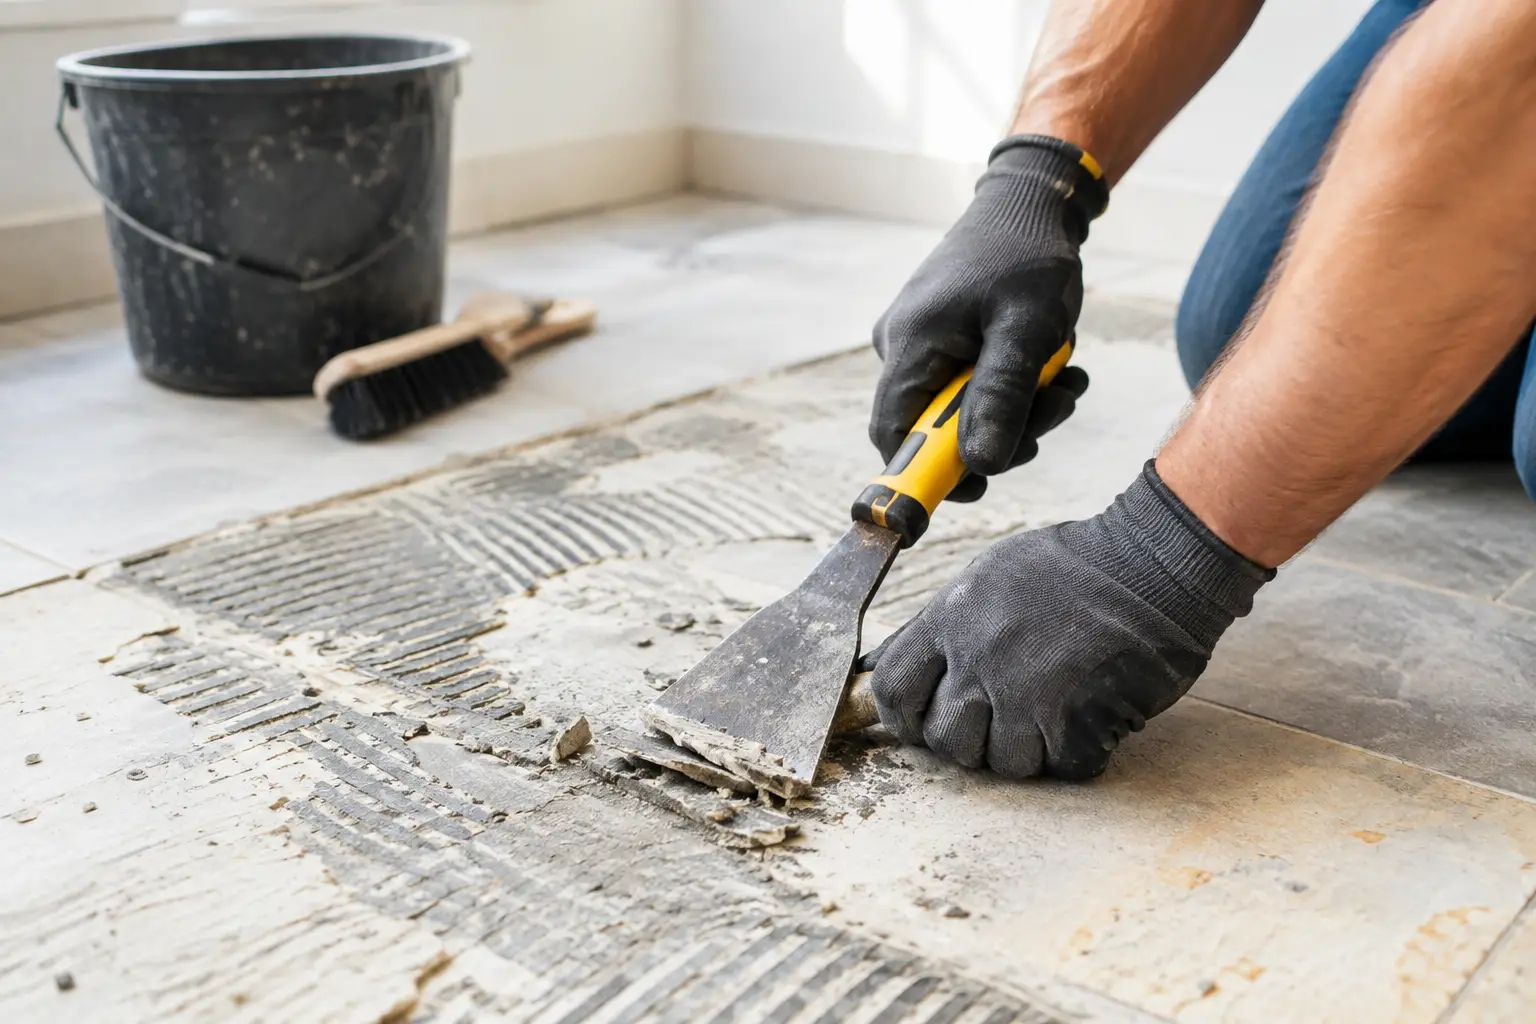
Floors usually allow for more robust equipment, but they still demand control. Thick beds of cement adhesive are best reduced gradually using a floor scraper, oscillating tool, rotary hammer with a wide chisel, or a specialist floor grinder with effective dust extraction. The right choice depends on the area and the depth of adhesive remaining.
For a small patch, hand tools may be enough. On larger rooms, hand scraping can become slow, inconsistent and physically demanding. Mechanical grinding is often the cleaner route to a flat substrate, especially where new large-format tiles, engineered timber, vinyl or polished concrete are planned. Those finishes make every ridge and hollow visible.
Be careful not to grind indiscriminately. A screed may be thinner than expected, and aggressive grinding can expose weak areas, crack the surface or alter falls designed to direct water towards a floor waste. In shower areas, falls and waterproofing details are functional, not cosmetic. Removing adhesive without understanding what sits beneath can create risks that do not appear until the room is back in use.
Once the bulk adhesive has been removed, vacuum the floor thoroughly and inspect it under raking light. Run a straightedge across the surface to identify high spots, voids and uneven transitions. A surface can look acceptable from standing height yet be unsuitable for precise tile installation.
Use the right equipment and protect the space
Adhesive removal creates sharp fragments, fine silica dust and considerable noise. Eye protection, gloves, hearing protection and a properly rated dust mask are essential. Cement dust should not be treated as ordinary household dust. Use tools connected to suitable extraction where possible, and isolate adjacent spaces before work begins.
Keep the work area orderly. Remove fittings that could be scratched, cover fixed joinery and protect floor edges, door frames and glazing. In occupied homes and commercial environments, containment matters as much as the removal itself. Dust migration can affect finished rooms well beyond the demolition zone.
Avoid using a heat gun around unknown adhesives, old finishes or waterproofing materials. Heat can produce unpleasant fumes, soften materials you intend to retain and increase fire risk. Likewise, do not use acidic cleaners to dissolve cement adhesive. They can damage concrete, react with other building materials and leave residues that interfere with future bonding.
Do not confuse clean with ready to tile
A substrate is not ready merely because the old adhesive is gone. It must be sound, dry, clean and sufficiently flat for the tile size and layout being installed. Loose areas need to be removed, cracks assessed and repaired where appropriate, and low spots addressed with a compatible levelling compound or screed.
This is where many renovation projects lose time. New tiles are laid over a surface that looks serviceable, only for unevenness to show through as lippage, poor joints or hollow spots. In wet areas, preparation also includes checking the waterproofing strategy. If membrane has been damaged during removal, it cannot be treated as a minor cosmetic issue. It needs a correctly detailed repair before tiling resumes.
Adhesive residue can also affect the new installation. Thin, firmly bonded remnants may be acceptable if they are sound and compatible with the proposed system, but ridges, soft adhesive and contaminated patches should be removed or properly prepared. The specification should suit the substrate, tile type, format and intended use of the room.
When professional removal is the better investment
DIY removal can be practical for a small splashback or a modest, non-wet-area repair. It becomes less straightforward when the job involves waterproofed bathrooms, large floor areas, natural stone, expensive joinery, uneven slabs or a tight programme. These projects need more than force and a hired tool. They need an understanding of the whole build-up beneath and above the tiles.
For homeowners, the value of professional preparation is certainty that the next stage starts from a stable base. For builders, developers and commercial project teams, it is about protecting programme, achieving consistent flatness and avoiding defects that surface after handover. At Perfectly Laid, removal and preparation are treated as part of the finished result, not as an inconvenient step before the visible work begins.
Before you select new tiles, take time to inspect what adhesive removal has revealed. A sound, level and correctly prepared surface gives every subsequent detail – layout, grout lines, falls, caulking and final finish – the standard it needs to look exceptional for years.