Tanking Versus Tile Waterproofing Explained
A beautifully tiled shower can still fail behind the surface. Water does not need a visible crack or a dramatic leak to cause trouble; repeated moisture can work through grout joints, movement gaps and poorly detailed penetrations over time. That is why tanking versus tile waterproofing is not simply a choice between two products. It is a decision about the whole build-up beneath the finish, the room’s exposure to water and the level of protection the project demands.
For bathrooms, wet rooms, laundries and high-performance commercial spaces, the tiles are the visible expression of the design. The waterproofing system is the unseen work that protects it. Getting both right is what keeps a premium finish looking exceptional for years rather than becoming an expensive remedial project.
What does tanking mean?
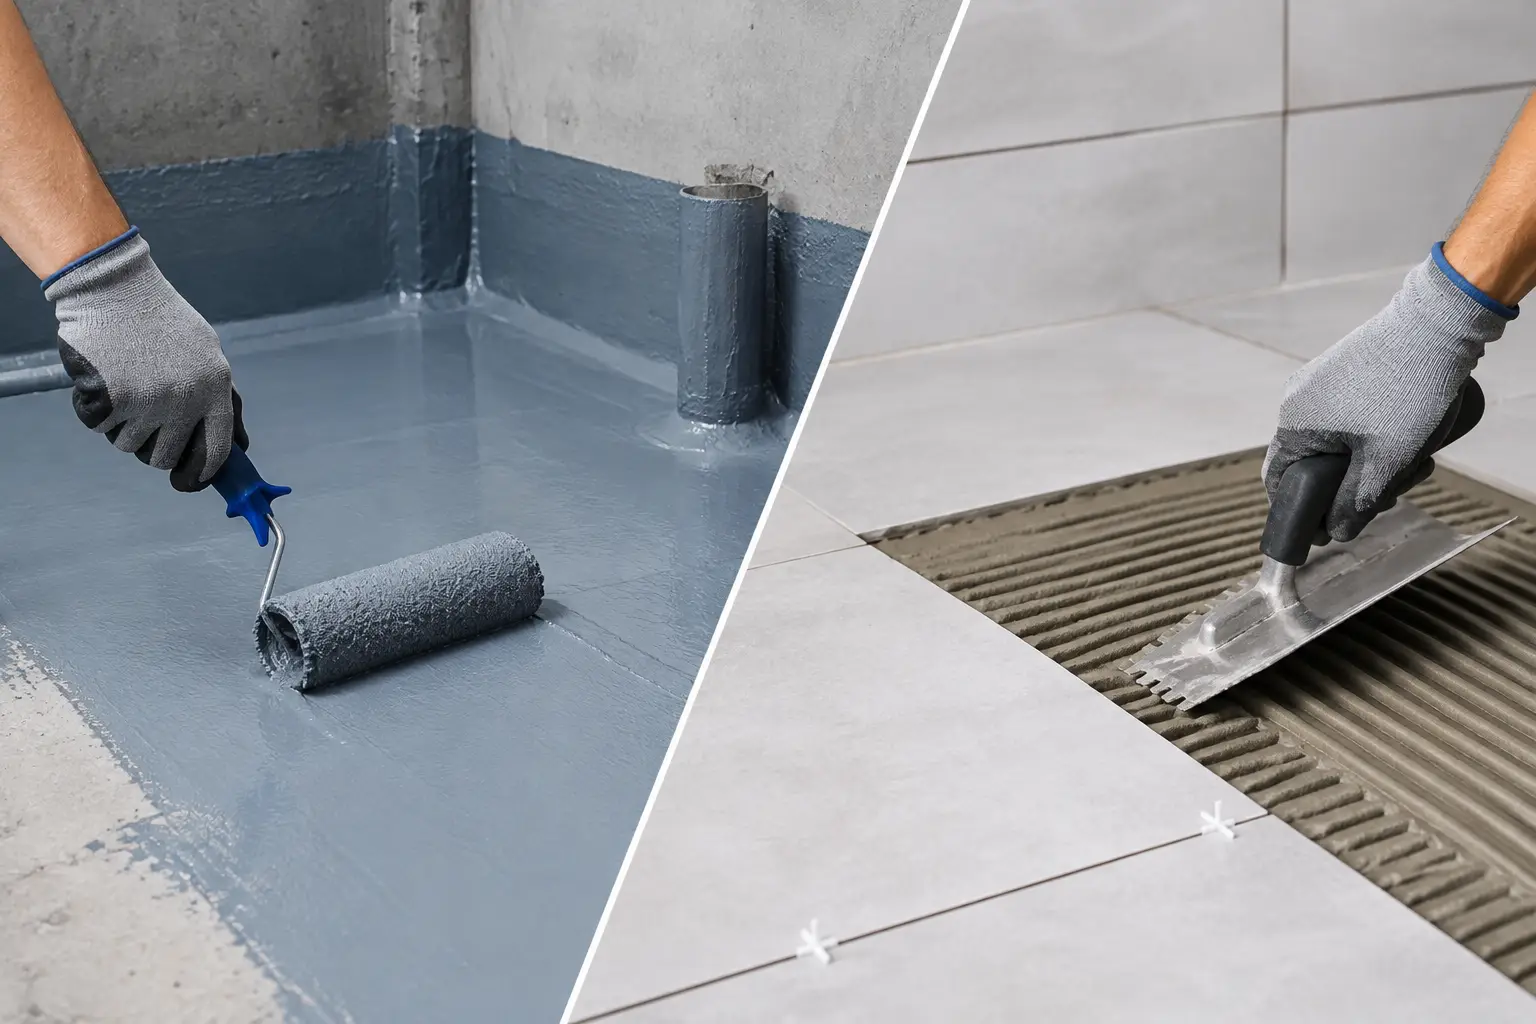
Tanking is a waterproofing method designed to create a continuous barrier that prevents water and moisture from reaching the substrate behind it. In tiling work, it usually refers to applying a waterproof membrane across walls, floors or both before tiling begins. The system is carried into corners, over junctions, around pipe penetrations and across changes in plane, using compatible tapes, collars and sealants.
The name comes from the idea of forming a watertight enclosure. In a shower area or wet room, that enclosure is not only about stopping obvious splashes. It addresses persistent humidity, saturated surfaces and water that can sit around drains or low points in the floor.
Tanking may be created with liquid-applied membranes, sheet membranes or cementitious systems. Each has a place, but they are not interchangeable. A liquid membrane can suit detailed bathroom geometry when applied evenly at the specified thickness. Sheet systems offer controlled membrane thickness and can be particularly effective where substrate movement or programme speed needs careful management. Cementitious systems are often selected for masonry or demanding wet-area applications, depending on the wider specification.
The quality of tanking depends as much on preparation and detailing as the membrane itself. A membrane cannot correct a loose wall lining, an uneven screed, a contaminated floor or a poorly formed fall to waste.
What is tile waterproofing?
Tile waterproofing is often used as a broad term for the waterproofing work completed before tiles are installed. Technically, tiles, grout and adhesive should not be treated as the waterproofing layer. They are a hard-wearing decorative finish, but they are not a guaranteed watertight system.
Even porcelain tiles with low water absorption have joints. Grout is not a substitute for a correctly installed membrane, and silicone around the perimeter is a movement seal, not the primary defence against moisture behind the tiled surface. In wet areas, water management starts below the tile.
In everyday conversation, a client may ask for tile waterproofing and a contractor may describe a membrane system as waterproofing for tiling. That language is understandable. The critical question is what has actually been specified: which surfaces are being protected, how far the membrane extends, how junctions are reinforced and how the system works with the chosen adhesive, grout and sealant.
Tanking versus tile waterproofing: the practical difference
The distinction is mostly one of scope and intent. Tile waterproofing can describe any waterproofing preparation for a tiled surface. Tanking describes a more comprehensive, continuous approach intended to contain water within a defined wet zone.
A tiled splashback behind a basin, for example, may need moisture-conscious preparation, but it does not experience the same volume or duration of water as a shower enclosure. A shower, wet-room floor or communal changing area needs a properly detailed waterproofing system that considers floors, walls, corners, pipework and drainage together. In that context, tanking is the more precise term.
This does not mean every bathroom requires identical treatment. The correct extent of waterproofing depends on the room layout, construction method, level of exposure and applicable project requirements. A family bathroom with a shower-over-bath has different risk points from a fully open wet room. A hotel bathroom, fitness changing facility or multi-unit development also brings repeatability, maintenance and programme considerations that should be resolved before installation begins.
The strongest specification is not necessarily the most complicated one. It is the one that matches the use of the space, the substrate and the finish, then is installed without shortcuts.
Start with the substrate, not the tile
Premium tilework begins before the first tile is unpacked. Walls must be sound, suitably flat and compatible with the selected waterproofing system. Floors need the right falls so water travels efficiently to the drain rather than pooling in corners or along a threshold.
In refurbishment work, this may involve removing failed finishes, checking for moisture damage, repairing wall linings and re-levelling floors. In new-build projects, it means coordinating the waterproofing sequence with plumbing, screeding, joinery and shower-screen installation. Small omissions at these interfaces can undermine an otherwise immaculate tiled finish.
Particular attention is needed at internal corners, wall-to-floor junctions, floor wastes, niches, hob edges and pipe penetrations. These are movement and water-entry points. A disciplined installation uses the relevant reinforcing components and allows the system to cure properly before adhesive is applied.
Trying to save time here rarely saves money. If a leak develops beneath a tiled shower, the repair can involve demolition, drying, substrate repairs, waterproofing and complete reinstatement. The visible tile is often the least of the cost.
Falls, drains and thresholds matter
Waterproofing cannot compensate for poor drainage design. In a wet room, the floor needs accurate falls towards the waste, with a drain detail that integrates correctly with the membrane. The transition at the doorway also needs thought so water is contained without creating an awkward step or compromising accessibility.
Large-format tiles can make these details more demanding. Their clean, expansive look is ideal for high-end bathrooms, but tile size, drain position and required falls must work together. Sometimes a linear drain, carefully planned cuts or a complementary smaller tile in the shower zone will provide the best technical and visual result.
Choosing the right system for the space
A reliable decision considers water exposure, substrate type, tile format, expected movement and the building’s use. For a domestic shower, a compatible membrane system beneath the tiled area is commonly the essential starting point. For a wet room, the waterproofing scope generally becomes broader because the floor is part of the shower environment and water may reach more of the room.
For balconies, patios and alfresco areas, the challenge changes again. External tiling faces weather, temperature variation, drainage loads and movement across a larger area. The waterproofing and drainage strategy must suit an exterior build-up rather than simply copying an internal bathroom detail.
Commercial work requires another layer of discipline. A hospitality washroom or fitness facility may experience sustained traffic, more frequent cleaning and repeated wetting. In multi-unit developments, consistency is equally valuable: one documented process, compatible materials and clear quality checks help protect every unit, not only the display suite.
Material compatibility should never be assumed. Primers, membranes, adhesives, grout and sealants are designed to work within particular systems. Mixing products without checking their suitability can create adhesion issues, curing problems or warranty uncertainty. A quality-first contractor will select the system as a whole, rather than treating each layer as an isolated purchase.
The finish is only as good as the detailing
Once waterproofing has cured, precision tiling protects both performance and appearance. Tile layout should be resolved before fixing, with balanced cuts, clean lines and considered placement around niches, mixers, drains and feature walls. Adhesive coverage needs to be appropriate for the tile type and location, particularly on floors and large-format porcelain.
Grout selection also matters. It shapes the final look, supports hygiene and must suit the movement and cleaning demands of the space. Perimeter joints and changes of plane should be finished with a suitable flexible sealant, not rigid grout, so minor building movement does not force a crack through the tiled surface.
This is where technical execution and design craft meet. A waterproofed room that looks poorly resolved is not a premium outcome. Equally, a striking tile installation without the right work behind it is a risk concealed by good styling.
Questions to ask before work begins
Before approving a bathroom or wet-area scope, ask what waterproofing system will be used and where it will be applied. Confirm how corners, wastes, niches and pipe penetrations will be detailed, whether the substrate requires repair or levelling, and how the floor falls will be checked before tiling.
It is also worth clarifying the sequence of works. Waterproofing needs appropriate curing time, and tiling should not be rushed over a system that has not reached the manufacturer’s requirements. On a tight programme, careful planning is far more reliable than compressing essential stages.
At Perfectly Laid, the aim is to make those decisions clear before the installation gathers pace. Preparation, waterproofing, tile setting and finishing are treated as one accountable process, so the final space delivers the visual impact clients expect and the protection it needs.
The best time to protect a tiled room is when the surfaces are still bare. Choose the waterproofing scope with the same care as the tile, because the craftsmanship beneath the finish is what allows the finish to remain beautiful.