How to Remove Tiles Without Damaging Substrate
A tile removal job can look deceptively simple until the first fractured tile takes plaster, screed or waterproofing with it. Knowing how to remove tiles without damaging substrate is less about force than control: isolating each tile, working from the right starting point and stopping before a minor repair becomes a full surface rebuild.
For a premium bathroom, kitchen or commercial fit-out, the substrate is not merely what sits behind the tile. It is the prepared foundation that determines whether the next finish looks crisp, stays level and performs for years. Protecting it is where careful demolition earns its value.
Start by identifying what sits beneath the tile
The correct removal method depends on the substrate and the adhesive system, not simply the tile type. A ceramic wall tile bonded over plasterboard needs a lighter touch than a porcelain floor tile fixed to a cement screed. Natural stone, large-format porcelain and older installations can each behave differently again.
Before lifting a tile, establish whether the surface is cement render, plasterboard, fibre cement sheeting, concrete, screed or a waterproofed wet-area lining. In bathrooms and laundries, assume there may be a waterproof membrane beneath the tiles unless you know otherwise. That membrane is a critical performance layer. Once punctured or torn, it cannot be treated as a cosmetic issue.
It also helps to identify the scope. Removing a single damaged tile is a precision repair. Removing an entire floor may justify more assertive equipment and a planned re-levelling stage. The aim remains the same, but the acceptable level of substrate disturbance changes with the project.
Prepare the space before any tile comes loose
Good demolition begins with protection. Remove fittings where practical, cover vulnerable surfaces and isolate the work area from dust. On a floor, protect nearby finished surfaces and plan a clear route for rubble. On walls, take extra care around taps, power points, niches, cabinetry and glazing.
Safety equipment is essential: eye protection, gloves, hearing protection, a properly fitted dust mask and sturdy footwear. Tiles can release sharp fragments without warning, while silica-containing dust from adhesives, grout and cement-based substrates requires controlled cutting and clean-up.
Turn off power to any electrical points in the work zone. If plumbing, underfloor heating, membrane terminations or concealed services may be present, do not guess. A small exploratory opening in the wrong place can cause a far more expensive problem than the tile replacement itself.
How to remove tiles without damaging substrate
The most reliable approach is to create separation around the tile before levering behind it. Start with the grout joints. Using an oscillating multi-tool with a grout-removal blade, or a careful manual grout saw for a smaller repair, cut out the grout around all four sides of the tile. Work to the full depth of the joint where possible, without cutting into adjacent tile edges.
This step matters because grout locks the tiled field together. If it remains intact, impact applied to one tile can transfer stress into surrounding tiles, chipping edges or pulling sections of substrate away with the adhesive.
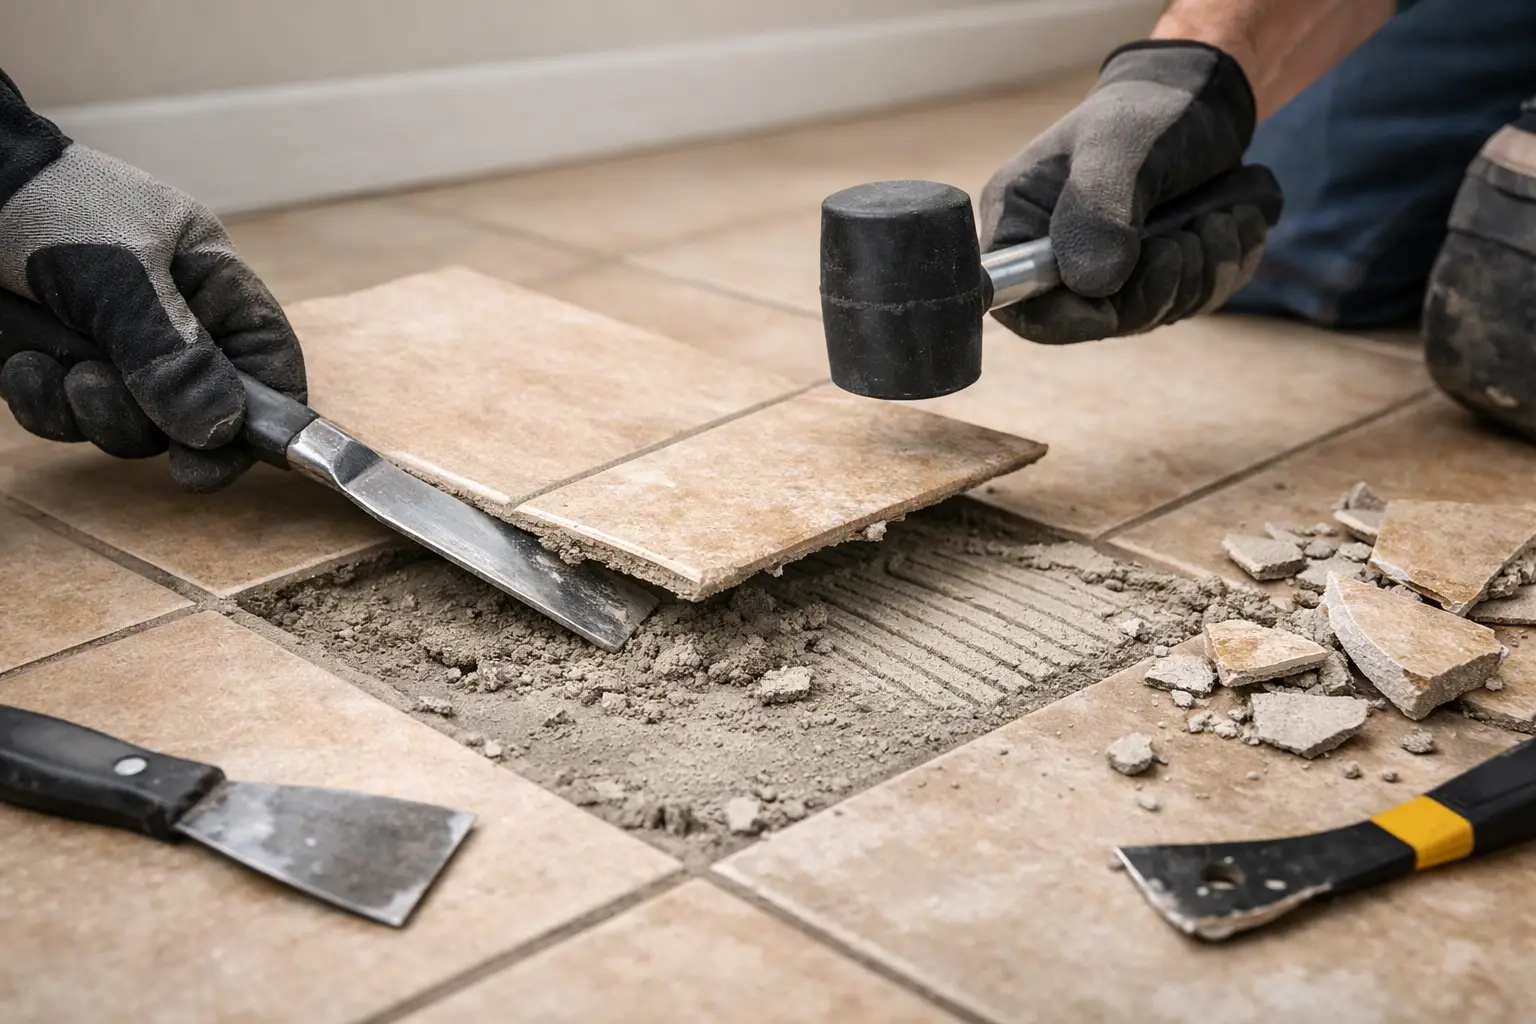
For a single tile, begin at the centre rather than an edge. Cover the tile with tape to help contain fragments, then use a centre punch and light hammer to create a controlled break point. Remove small pieces from the centre outwards with a narrow cold chisel, holding the chisel at a low angle – almost parallel to the wall or floor.
Avoid driving the chisel directly into the substrate. The objective is to shear the adhesive bond gradually, not to dig behind the tile. Short, measured taps are safer than heavy blows. As more of the tile is removed, work beneath the remaining fragments in small sections, always directing pressure towards the void you have created.
On a larger area, start at a loose, damaged or perimeter tile where possible. A demolition hammer with a wide tile chisel can be efficient on solid concrete floors, but it demands experience. Used too aggressively, it can gouge screed, crack a slab edge or strip a wall back to its framing. For walls, an oscillating tool, hand chisel and patience will often preserve more of the surface than powered impact tools.
Keep the tool angle low and the force measured
Angle is the detail that separates controlled tile removal from unnecessary damage. A steep chisel angle concentrates force into the substrate. A low angle works along the adhesive line, encouraging the tile or adhesive to release in layers.
This is particularly important with plasterboard and rendered walls. Even when a tile comes away cleanly, its adhesive may remain firmly bonded. Trying to remove every trace with a hammer can tear the face of the board or create hollows in the render. In many cases, it is better to shave the adhesive down carefully with a scraper, multi-tool or suitable grinding attachment, then repair and re-level the surface.
For floor work, assess each section as it is exposed. A sound screed can tolerate careful mechanical adhesive removal. A weak, cracked or drummy screed may fail under the vibration of demolition. Where the base is compromised, controlled removal followed by local repair or a new levelling system delivers a more dependable result than trying to preserve a substrate that is no longer fit for purpose.
Treat waterproofing as a performance layer, not a backdrop
In wet areas, preserving the waterproofing membrane is usually the highest-risk part of tile removal. Tile adhesive can bond tightly to a membrane, and even careful chiselling can create pinholes, tears or delamination that may not be obvious at first glance.
If only one tile needs replacing, work slowly and inspect the exposed surface once the adhesive is removed. Any cut, puncture, lifted edge or doubtful area should be repaired with a compatible waterproofing system before retiling. If several tiles are being removed, or the membrane has been disturbed broadly, a full waterproofing assessment is the safer course.
There is a trade-off here. Preserving a sound membrane can reduce time and cost, but retaining a damaged or uncertain membrane risks concealed moisture failure behind a beautiful new finish. In bathrooms, showers and commercial wet areas, the quality of the preparation is never visible at handover, yet it protects the entire installation long after the grout has been cleaned.
Remove adhesive without creating an uneven base
Once tiles are lifted, the surface may look acceptable while still being unsuitable for new tiles. Adhesive ridges, chipped patches and high spots can telegraph through large-format tiles, affect lippage and compromise adhesive coverage.
Choose the removal method to suit the substrate. A floor scraper or oscillating scraper blade can remove softer adhesive with minimal disturbance. On concrete or sound screed, a dust-controlled grinder with the appropriate diamond cup wheel may be suitable for stubborn residue. Keep the tool moving and check the surface frequently. Grinding too deeply creates low spots that then need levelling.
Walls require even more restraint. If adhesive is bonded to plasterboard, grinding may damage the paper face and weaken the board. A skim repair, replacement board or new substrate may be the cleaner solution, particularly where a high-end finish or large-format tile is planned.
Inspect, repair and prepare before retiling
Tile removal is only successful when the exposed substrate is sound, clean, flat and ready for the next system. Tap the surface to identify hollow areas, check for cracks, and use a straightedge to reveal highs and lows. Remove dust thoroughly before applying primers, patching compounds, waterproofing or adhesive.
Do not rush to install replacement tiles simply because the old ones are gone. Let repairs cure as specified, reinstate waterproofing where required and confirm that the plane of the wall or floor will support the chosen tile format. Large tiles and tight grout joints are less forgiving of imperfect preparation than small-format finishes.
For feature walls, wet areas, stone finishes and complex floor layouts, professional removal is often the more economical decision. Perfectly Laid approaches demolition as the first stage of precision installation, protecting the surfaces and details that allow the finished space to feel considered rather than compromised.
The best tile removal work leaves no drama behind it: a stable, properly prepared foundation and a clear path to a finish that looks as though it was always meant to be there.