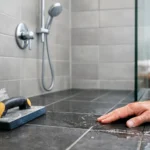
How to Waterproof Shower Walls Properly
A shower can look immaculate on day one and still fail quietly behind the tile if the waterproofing has been rushed. That is the part many people never see, yet it is the layer that protects the finish, the substrate and, ultimately, the value of the room.
If you want to know how to waterproof shower walls properly, the first thing to understand is this: tiles and grout are not the waterproofing system. They are the visible finish. The real protection sits underneath, in the preparation, the membrane, and the way every junction and penetration is treated. When that process is precise, the bathroom not only looks refined – it performs as it should for years.
How to waterproof shower walls the right way
Waterproofing shower walls is a sequence, not a single product. The wall surface must be stable, clean and suitable for the chosen system. Junctions need reinforcing. Corners, tap penetrations and shower fittings need careful detailing. Only then should the membrane be applied to the required coverage and thickness.
That matters whether you are renovating one ensuite or managing multiple wet areas in a larger development. A premium finish depends on what happens before the first tile is laid.
Start with the substrate, not the membrane
The wall beneath the waterproofing must be sound. If there is movement, dust, loose sheeting, old adhesive, moisture damage or poor alignment, applying membrane over the top will not solve the problem. It simply hides it for a while.
In most shower areas, the substrate may be cement sheeting, fibre cement board, masonry or another approved wet-area lining. Plasterboard in the wrong location, deteriorated sheeting or walls that are out of plumb should be addressed first. This is where quality preparation separates a durable installation from a cosmetic one.
A properly prepared wall should be clean, dry, secure and fit for tiling. If the surface requires priming, that step needs to be completed before waterproofing begins. Skipping primer where it is required can affect adhesion and compromise the entire system.
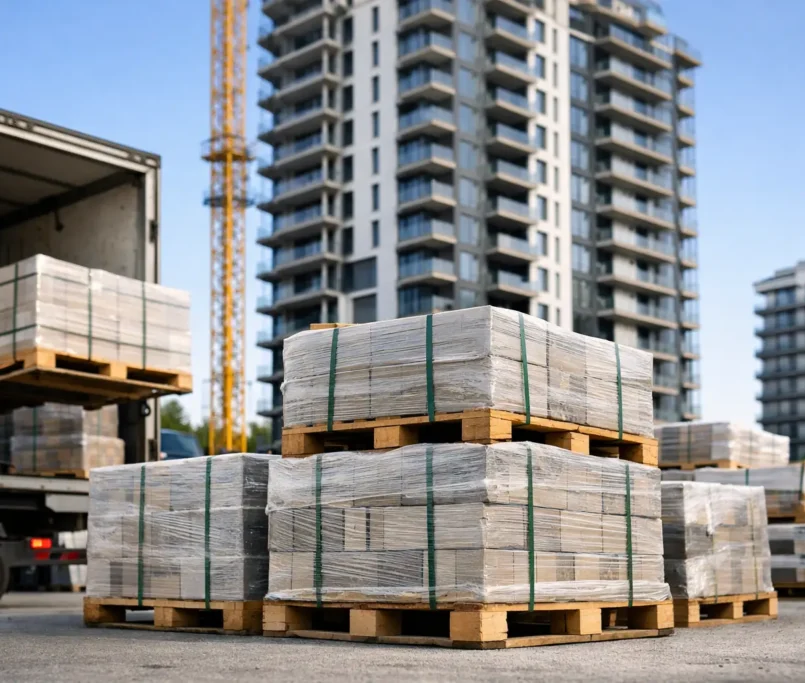
Choose a waterproofing system that suits the build
There is no single answer for every bathroom. The right system depends on the substrate, the shower design, local compliance requirements and the products specified for the rest of the installation.
Liquid-applied membranes are common because they can form a continuous barrier over complex surfaces. They work well when installed with discipline, especially around corners and penetrations. Sheet membranes can also be an excellent option, particularly where controlled thickness and uniform coverage are priorities. Both can perform well. Both can also fail if the detailing is poor.
This is the trade-off many clients do not see at quoting stage. A lower-cost approach may appear similar once tiled, but waterproofing quality is about compatibility, application accuracy and cure times – not just the material itself.
Preparing shower walls for waterproofing
Preparation is where performance begins. Every premium tiled shower relies on the same principle: the finish is only as good as the surface behind it.
Any gaps, fixings, joints and sheet edges should be treated in line with the membrane system being used. Internal corners and wall junctions generally require bond breakers or reinforcing tape so the membrane can accommodate slight movement without splitting. That detail is critical because corners are among the first places a poor waterproofing job will show signs of stress.
Penetrations also deserve special attention. The points where taps, mixers and shower outlets pass through the wall are common failure zones. These areas need precise sealing, not a rough cut and a hopeful bead of sealant afterwards.
The wall should then be primed if required by the manufacturer. This is not an optional extra. It helps the membrane adhere correctly and promotes a more consistent finish across the surface.
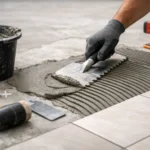
Apply the membrane to the correct thickness
One of the biggest mistakes in shower waterproofing is assuming coverage equals compliance. A wall can look coated and still fall short if the membrane is too thin, patchy or uneven.
Most waterproofing systems require at least two coats, with the first fully cured or touch-dry before the second is applied. The finished membrane needs to meet the specified dry film thickness, particularly in shower areas that face regular water exposure. This is why professional application matters. Thickness is not judged by eye alone.
Each coat should be continuous and properly lapped into corners, edges and transitions. There should be no pinholes, gaps or weak spots. If niches, ledges or boxed-out sections are part of the design, those need the same level of care. Architectural features can elevate the bathroom visually, but they also add complexity to the waterproofing process.
Do not rush curing time
A common reason waterproofing underperforms is that follow-on trades move too quickly. Membranes need time to cure before adhesive and tile are introduced. If that window is shortened, the waterproof layer may be compromised before the bathroom is even complete.
This is one of those areas where programme pressure and workmanship can come into conflict. On well-run projects, both are managed. The sequence is planned properly so the bathroom can move forward without sacrificing the integrity of the installation.
The details that matter most in shower wall waterproofing
When people ask how to waterproof shower walls, they often picture coating the flat sections and moving on. In reality, the success of the job is usually decided by the details.
Wall-to-floor junctions need continuity between horizontal and vertical waterproofing. Internal corners need flexibility. Pipe penetrations need neat, sealed transitions. Shower niches need full membrane coverage, including all returns and edges. Frameless screens and fixings also need foresight, because drilling and hardware placement can create vulnerability if they are not planned correctly.
This is why experienced installers treat waterproofing as part of the full build, not an isolated trade line. The shower area has to work as a system, from substrate preparation through to caulking and finishing.
Can you waterproof over existing tiles or surfaces?
Sometimes, but it depends entirely on the condition of the existing surface and the scope of the renovation. In most premium bathroom projects, especially where longevity matters, removing the old finish and inspecting the substrate is the safer route.
Waterproofing over existing materials can seem efficient, but it leaves less room to correct hidden issues such as moisture damage, unstable walls or failed previous work. For a surface that will be exposed to water every day, certainty is worth more than convenience.
How far up should shower wall waterproofing go?
This depends on the layout of the shower and the relevant wet-area requirements, but shower walls should be treated as fully exposed surfaces within the splash zone. In practical terms, that means waterproofing should extend to the required height and area for the shower design, with consistent coverage around all vulnerable sections.
Half-measures rarely age well in wet areas. If the room is being built to a high standard, waterproofing should reflect that standard from edge to edge.
Why professional execution changes the result
On paper, waterproofing can look straightforward. In practice, it relies on judgement, product knowledge and consistency. The right membrane applied badly will still fail. A premium tile selected for a luxury bathroom will not compensate for poor preparation behind it.
That is why disciplined execution matters so much in both residential and commercial work. Homeowners want assurance that their finished bathroom will stay beautiful and perform properly. Builders and developers need trades who can maintain that same standard across multiple units without compromising programme or presentation.
At Perfectly Laid, waterproofing is treated as a protective craft, not a hidden formality. It is part of delivering a bathroom that feels refined on the surface and dependable underneath.
The best shower walls are not only straight, elegant and beautifully tiled. They are built with care where no one will ever look – and that is usually where quality makes itself known years later.