Screeding for Tiles: The Floor That Makes It
You can spot a rushed screed long after the installer has left – the grout lines start to look “wavy”, a corner sounds hollow underfoot, or water sits stubbornly on the wrong side of a shower. Tiling is the visible finish, but screeding is the hidden geometry that decides whether that finish feels calm and architectural, or slightly off every time you walk into the room.
Screeding a floor for tiles is not just about making it flat. It is about controlling level, falls, strength, drying, and compatibility with adhesives and waterproofing. Get those right and tiles sit crisp, joints stay consistent, and movement is managed. Get them wrong and even beautiful tiles cannot save the outcome.
What screeding a floor for tiles actually achieves
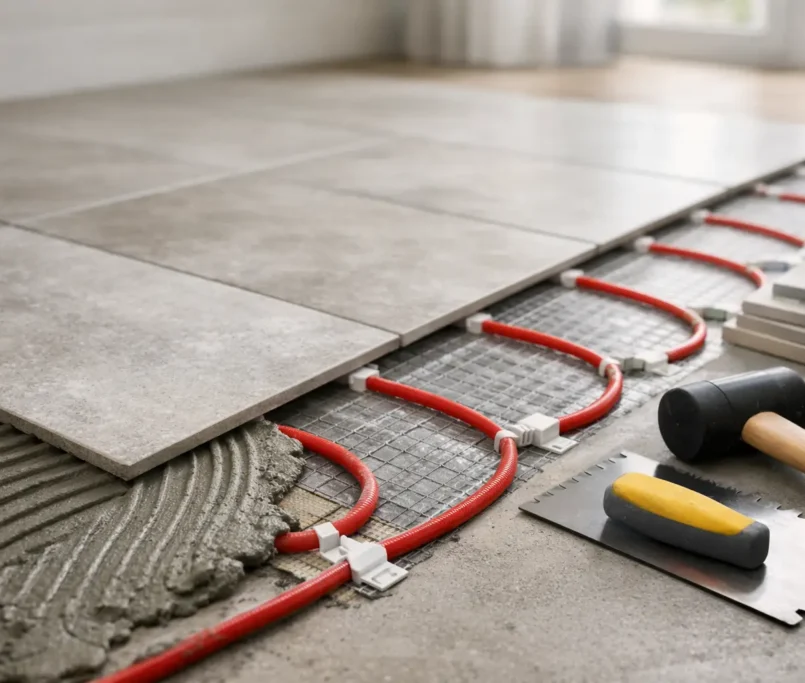
A screed is a cement-based layer installed over a structural base (concrete slab, suspended floor with appropriate build-up, or existing substrate) to create the surface that will receive tile adhesive and tiles. It can be bonded directly to the slab, laid unbonded over a membrane, or installed as a floating screed over insulation or underfloor heating – each has different rules.
The job of a screed is to deliver three things at once.
First, it creates a plane: the floor becomes flat enough that tile adhesive can do its job without being asked to compensate for big hollows and ridges. Tile adhesive is not a levelling compound. It will tolerate minor correction, but when it is used to “fix” an uneven floor you often end up with weak spots, lipping between tiles, and inconsistent coverage.
Second, it controls levels and transitions: the finished height at doorways, the meet-up to timber or carpet, the relationship between kitchen floors and islands, and the crisp line where a bathroom floor meets a bedroom. High-end projects live or die on these edges.
Third, it builds in falls where water must move: showers, wet rooms, balconies, terraces, pool surrounds, and commercial wash-down areas. Falls are not a styling preference. They are performance.
When you need screed – and when you might not
Not every tiled floor requires a traditional screed. If you have a sound, flat concrete slab already within tolerance, you may only need local patching and a suitable primer before tiling. Likewise, some renovation floors are better served by a high-quality smoothing compound rather than adding a thick cement layer.
You generally need a screed when the substrate is out of level, the surface is too rough or inconsistent to receive tiles, you need to set falls, you are covering services (like pipes or conduit), or you are building a floating system over insulation or underfloor heating.
There is also the “it depends” scenario that catches many projects: the slab might look fine until you check it with a long straightedge and laser. A few millimetres of deviation may not matter under small-format tiles, but it can be glaring under large-format porcelain where light rakes across the surface. Bigger tiles demand better prep.
Choosing the right screed type for your project
The best screed is the one that suits the substrate, the environment, and the programme. There is no single “premium” option that wins every time.
Sand and cement screed (traditional)
Traditional sand and cement is still a workhorse. It can be cost-effective and strong when mixed and placed correctly, and it works well for forming falls in wet areas.
The trade-off is drying time and consistency. If the mix is too wet, it can shrink and crack. If it is too dry or poorly compacted, it can be weak or dusty at the surface. Traditional screeds also demand patience – tile too early and moisture can compromise adhesives, encourage efflorescence, or stress waterproofing layers.
Polymer-modified and fast-drying screeds
Where programmes are tight – commercial fit-outs, multi-unit stages, or time-sensitive renovations – polymer-modified or fast-drying screeds can be a smart decision. They are designed to reach tile-ready moisture levels sooner and often deliver improved flexural strength.
The trade-off is that they are system-led. You need to follow the manufacturer’s instructions precisely: primers, minimum thickness, mixing ratios, working times, and curing. They are not forgiving of improvisation.
Self-levelling smoothing compounds (levellers)
Levelling compounds are ideal when you need a very flat surface for large-format tiles, or when you are correcting minor deviations without adding a heavy build-up. They can produce a refined, tile-ready finish and can be paired with underfloor heating systems (depending on the product).
The trade-off is that they are not a fix for a failing substrate. If the base is contaminated, unstable, or moving, a leveller will mirror those problems. Surface preparation becomes non-negotiable.
The details that separate “acceptable” from precision
A great tiled floor looks effortless because the hard decisions were made before the first tile was set.
Flatness is not the same as level
Clients often ask for a “level” floor. In reality, you might want the floor level across a room, but you also might need intentional falls in wet areas. The consistent requirement is flatness – the absence of abrupt changes that cause lipping.
A floor can be perfectly level and still be unacceptably uneven. That is why straightedge checks matter as much as laser levels.
Thickness, bonding and movement matter
Bonded screeds rely on a sound mechanical and chemical bond to the slab. That means the slab must be clean, free of laitance, and properly primed or slurry-bonded where specified. Unbonded and floating screeds introduce membranes or insulation layers, which change thickness requirements and increase the importance of movement joints.
If movement is not respected, it shows up later as cracked grout, tented tiles, or hairline fractures that appear “mysteriously” months after handover.
Falls in showers and wet rooms must be deliberate
The fall to a waste is not something to “make up” with extra adhesive on the day of tiling. The screed is where falls should be formed and verified.
This is also where design intent meets reality. Linear drains, large-format tiles, and minimal grout lines look exceptional, but they narrow your tolerance for error. A few millimetres in the wrong place can create ponding, edge lipping, or awkward cuts at the drain. Precision here is not luxury – it is basic performance with a high aesthetic standard.
A disciplined process for screeding a floor for tiles
Screeding is most reliable when it is approached as a controlled system rather than an isolated task.
First comes assessment: checking the substrate for cracks, contamination, moisture issues, deflection (on suspended floors), and existing levels. This is also where you confirm finished floor heights relative to thresholds, cabinetry, and fixtures.
Then comes preparation: mechanically cleaning where required, repairing weak areas, applying primers or bonding agents, and installing membranes if the specification calls for unbonded or waterproofed build-ups.
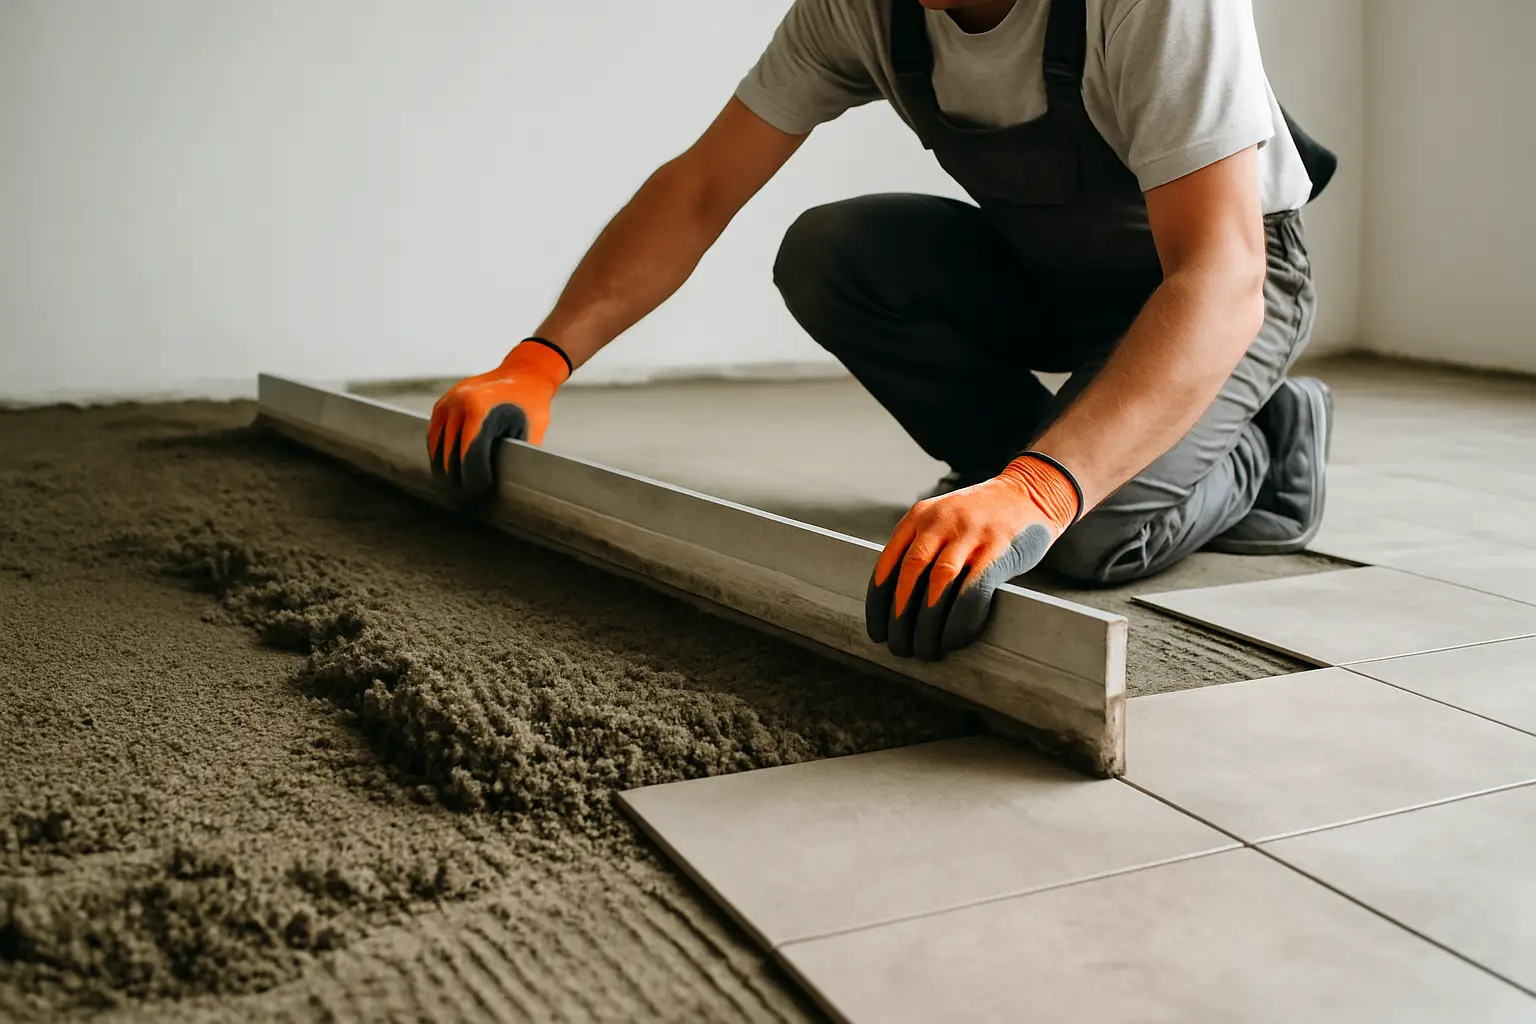
Setting datum and falls follows. A laser line and well-placed screed rails or level points create the “map” the screed will follow. On premium projects, this step is where you protect the design – aligning levels through doorways and keeping transitions intentional.
Placement and compaction is the moment that decides strength. Screed must be mixed correctly, placed within working time, compacted, and ruled off. Overworking can bring excess fines and water to the surface; underworking can leave voids.
Curing and protection is the part people try to rush. Screed needs the right environment to gain strength and dry predictably. Excess heat, airflow, or premature loading can cause curling or cracking. The room might look finished enough to “just walk on”, but your floor does not care about appearances – it cares about curing.
Finally, the floor is checked before tiling: flatness, surface integrity, and moisture condition. If waterproofing is part of the build-up (common in bathrooms, balconies, and wet rooms), it must be compatible with the screed and sequenced correctly.
Common failure points (and how professionals avoid them)
Most screed problems are not dramatic on day one. They are subtle, and that is why they are expensive.
Rushing the drying cycle is a frequent culprit. Moisture trapped beneath porcelain tiles has fewer places to go, and problems can emerge as staining, debonding, or grout discolouration.
Using tile adhesive to compensate for poor screed flatness is another. It tends to create inconsistent bed thickness, which can compromise adhesion and make it harder to keep tile faces aligned.
Skipping movement joints or ignoring the substrate’s existing joints is a third. Floors move. The question is whether your build-up has respected that movement or tried to fight it.
And then there is sequencing. Screed, waterproofing, primers, adhesives, and tiles are not interchangeable layers. They are a system, and each layer must be selected and installed to support the next.
What to expect when you specify screeding properly
When screeding is done to a high standard, the benefits show up everywhere – even in ways clients do not immediately name.
The tiling programme becomes more predictable because the installer is not battling the substrate. Tile layouts stay true because levels and falls are already set. Cuts become cleaner because you are not “chasing” the floor. And the finished surface feels intentional – that quiet sense of perfection that makes a bathroom or kitchen look designed rather than simply renovated.
For homeowners, it reduces the risk of call-backs and the frustration of small imperfections that become impossible to unsee. For builders and developers, it protects consistency across units and helps keep handover quality stable at scale.
If you want an end-to-end trade partner who treats preparation with the same seriousness as the finished tile, Perfectly Laid approaches screeding as part of a precision system: levels, falls, waterproofing compatibility, and finishing details all aligned to the brief.
A tiled floor should feel effortless when you live with it. The fastest way to get there is to insist on a screed that is measured, verified, and allowed to do its job – because perfection at the surface is built underneath it.