How to Minimise Dust During Tile Demolition
A beautiful new tiled surface should not begin with dust settling through the entire property. Knowing how to minimise dust during tile demolition protects the home, keeps adjoining work areas usable and gives the new installation a cleaner, more controlled foundation. It also protects people on site from fine airborne particles, including respirable silica dust released when ceramic, porcelain, stone and cement-based adhesives are broken up.
Dust-free demolition is not realistic. Tile removal is a disruptive process by nature, particularly where tiles have been firmly bonded to a screed, concrete slab or fibre-cement substrate. The professional standard is different: contain the dust at its source, prevent it travelling, remove it safely and leave the substrate ready for precise preparation.
Why tile demolition creates so much dust
Tiles fracture into visible fragments, but the finer issue is what happens underneath. A demolition hammer, scraper or grinder can disturb adhesive, grout, levelling compounds and the substrate itself. Those materials can create extremely fine dust that remains airborne long after the larger debris has been collected.
Bathrooms and laundries are often easier to isolate because they are enclosed rooms. Open-plan kitchens, living areas and commercial fit-outs require a more deliberate approach. In a high-end renovation, the risk is not limited to cleaning time. Dust can settle into joinery, soft furnishings, air-conditioning returns, electrical fittings and freshly painted surfaces, affecting the quality of the whole project.
The amount of dust depends on the tile type, adhesive strength, substrate and removal method. Small wall tiles may release cleanly with hand tools, while large-format porcelain fixed with a high-strength adhesive can demand more mechanical work. The right method is selected before the first tile is lifted, not after dust has already escaped into the property.
How to minimise dust during tile demolition
The most effective approach combines physical containment, controlled removal, local extraction and disciplined cleaning. Each measure works better when it supports the others.
Isolate the work zone properly
Start by creating a sealed demolition zone. Doorways should be covered with heavy-duty plastic sheeting, securely taped around the perimeter, with a zipped access point where regular entry is required. In occupied homes, temporary protective screens can also separate demolition from circulation routes and protect nearby finishes.
Close windows in adjacent rooms and cover vents or return-air grilles within the work area where appropriate. If the property has ducted heating or cooling, it is sensible to switch the system off during the dusty stage. Otherwise, the system can carry fine particles into rooms that have never been entered by the demolition team.
Containment must extend beyond the room itself. Floors along the access route need durable protection, and debris should be removed in covered containers or rubble bags. Carrying broken tiles through a hallway without a controlled route can undo the care taken inside the bathroom or kitchen.
Use the right removal method for the surface
The fastest method is not always the cleanest or safest. Mechanical demolition tools are often necessary, but they should be sized for the task and used with control. Excessive force can damage the substrate, create more airborne material and add avoidable repair work before waterproofing or tiling begins.
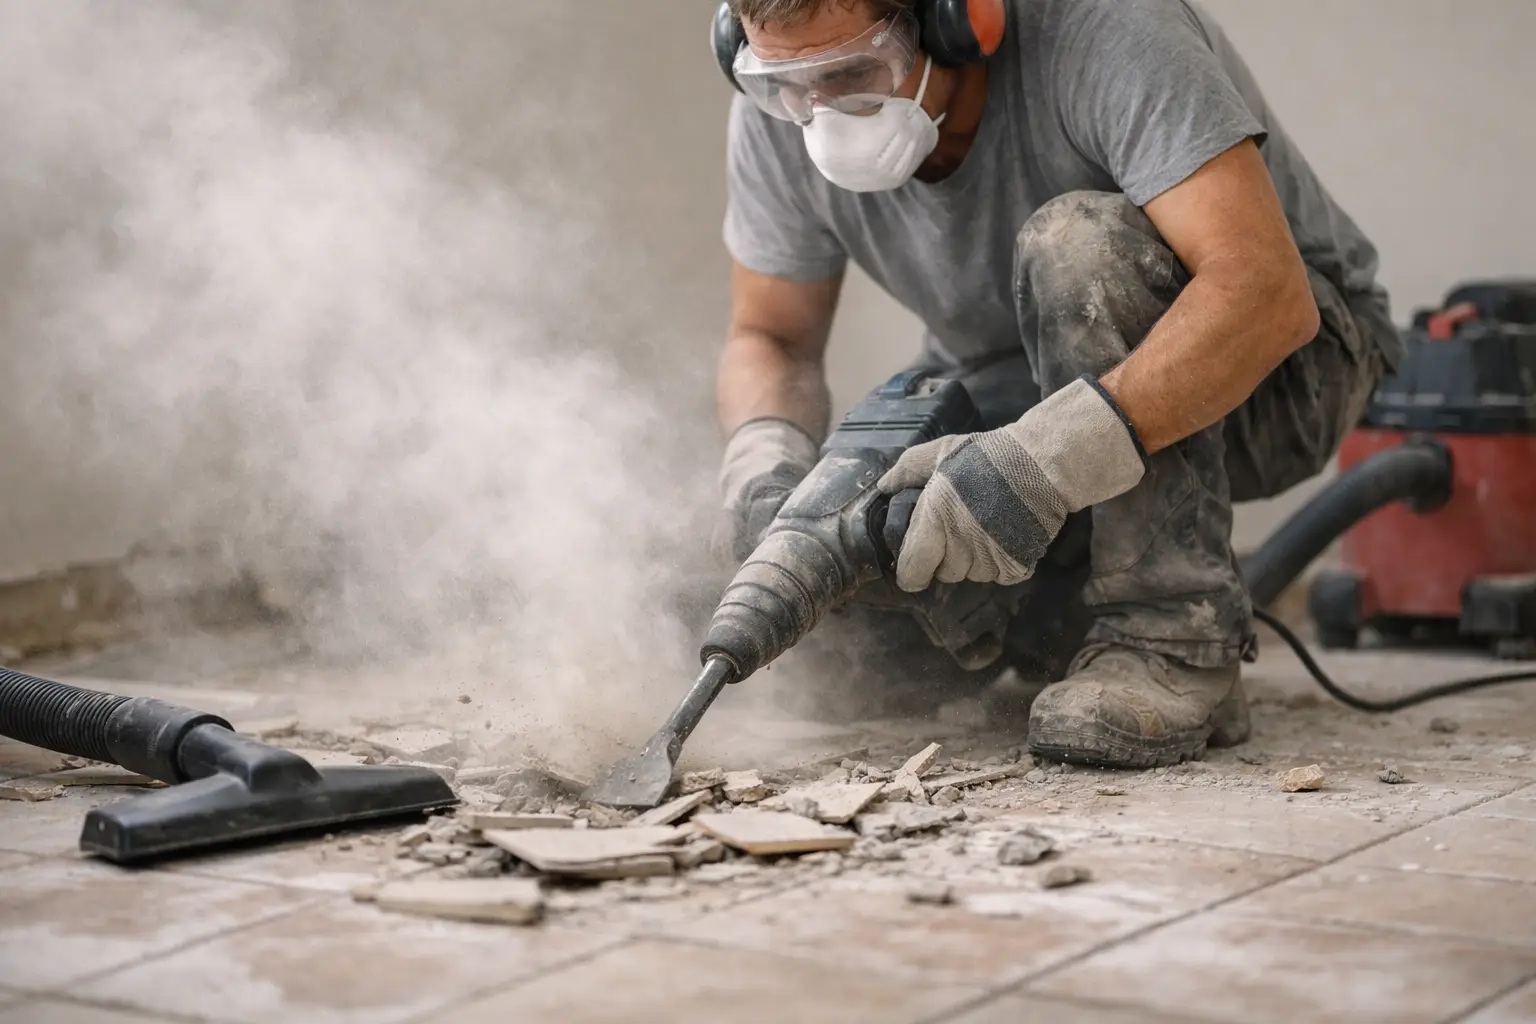
For wall tiles, careful removal with a hand chisel or scraper may be suitable in sensitive areas, such as around retained cabinetry, stone benchtops or feature plasterwork. On floors, an appropriate tile stripper or demolition hammer with a wide blade can lift tiles efficiently while limiting unnecessary pulverising of the underlying screed.
Where grinding is needed to remove adhesive residue or level a surface, it should be undertaken with purpose-built dust extraction. Uncontrolled grinding is one of the quickest ways to fill a work zone with fine dust. A tidy demolition stage is not only about presentation. It gives the installer a clearer view of the substrate condition and supports a more accurate preparation scope.
Pair tools with HEPA-grade extraction
Vacuum extraction at the point of work is one of the most valuable controls available. Professional tools can be connected to a suitable HEPA-filtered dust extractor, capturing a significant proportion of dust before it becomes airborne. The extractor must be correctly maintained, fitted with intact filters and sized for the tool being used.
A domestic vacuum cleaner is not a substitute. Fine construction dust can pass through inadequate filtration, be expelled back into the room or damage the machine. For a renovation with quality finishes and occupied areas nearby, professional extraction equipment is a practical investment in protecting the property.
Negative-air equipment may also be appropriate for larger areas, multi-room refurbishments or commercial projects. By drawing air from the contained zone through filtration, it helps reduce the chance of dust drifting into adjoining spaces. Its effectiveness depends on good sealing. An extractor cannot compensate for gaps around doors, unprotected penetrations or people repeatedly walking in and out of the work zone.
Use moisture carefully, not indiscriminately
A light mist can suppress dust when lifting tiles or breaking up particularly dry material. However, water is not a universal answer. Too much moisture creates slurry, makes debris heavier to handle and can introduce risks around electrical services, timber substrates, cabinetry and finished surfaces.
Water should never be sprayed near live electrical points or used in a way that allows moisture to reach areas below, particularly in upper-floor bathrooms. In many projects, extraction and containment provide a cleaner, more predictable solution than wet demolition alone. The correct balance depends on the substrate, the room and what is being retained.
Remove debris frequently and clean in stages
Leaving rubble piled in the room increases the chance of fragments being crushed underfoot and creates more dust each time the pile is moved. Broken tiles should be bagged or placed in covered bins progressively, with sharp edges managed safely. This keeps access clearer and helps the team inspect the exposed surface as work proceeds.
Cleaning should be performed throughout demolition, not saved for the end. HEPA vacuuming of horizontal surfaces, ledges and access routes captures settled dust before it is disturbed again. Sweeping with a dry broom should be avoided, as it simply returns fine particles to the air.
Once demolition is complete, the containment should remain in place until the room, tools and debris route have been cleaned. Removing plastic sheeting too early can release accumulated dust into the home at the final moment.
Protecting the substrate matters as much as protecting the room
A dust-conscious demolition process also preserves what sits beneath the tiles. The aim is to expose a stable base that can be assessed, repaired and prepared correctly. Aggressive removal can gouge a concrete slab, fracture a screed, damage wall linings or compromise waterproofing that needs to be removed and reinstated in a controlled manner.
After the tiles are lifted, the substrate should be checked for hollows, cracks, moisture concerns and adhesive build-up. It may need grinding, patching, re-levelling or new screeding before the next stage begins. Rushing this work to reduce time on site is false economy. Precision tile installation relies on a flat, sound and properly prepared surface.
In wet areas, demolition must also be planned around waterproofing. Existing membranes are frequently damaged during tile removal, even if they appear intact. A new waterproofing system should be assessed as part of the renovation scope rather than treated as an afterthought. This is where a complete trade process protects both the visual result and the long-term performance of the room.
When professional demolition is the better choice
Homeowners can sometimes remove a small tiled splashback or a limited floor area themselves, provided they have suitable protection and understand the material they are working with. The calculation changes when the area is large, occupied, connected to valuable finishes or part of a bathroom renovation requiring waterproofing, substrate repair and precise reinstallation.
Professional demolition is particularly worthwhile where there may be silica exposure, where tile removal sits near electrical or plumbing services, or where the project has a fixed handover date. For builders and project managers, a controlled process helps maintain programme certainty across multiple rooms or units. It prevents one dusty, poorly contained activity from delaying painters, cabinetmakers, flooring contractors or final cleaning teams.
At Perfectly Laid, demolition is approached as the first stage of a finished installation, not a separate rough trade task. Careful containment, quality equipment and considered surface preparation create the conditions for the level of waterproofing, layout and finishing detail that premium spaces demand.
The best time to protect your new tiled space is before the old tiles are touched. Establish the containment plan, confirm the debris route and choose the removal method around the surface you need to preserve. That discipline keeps disruption contained and leaves the project ready for work that looks as refined as it performs.