Waterproof Shower Tiling Guide
A shower rarely fails because of the tile. It fails because what sits behind the tile was rushed, guessed, or treated as a minor step. This waterproof shower tiling guide focuses on the part of the bathroom that protects the finish you can see – and the structure you cannot.
For homeowners, that means avoiding swelling skirtings, stained ceilings below, and mould that appears months after handover. For builders and project managers, it means fewer defects, fewer call-backs, and a bathroom that performs as well as it presents. In a premium space, waterproofing is not a background task. It is the discipline that protects the entire result.
Why a waterproof shower tiling guide matters
A well-tiled shower should do two jobs at once. It should look refined, with clean set-out, sharp cuts and balanced joints. It should also manage constant water exposure without allowing moisture into the substrate, framing, or adjoining rooms.
That second job depends on sequence and precision. A beautiful porcelain tile laid over poor preparation will not save the installation. Nor will expensive fittings. If the falls are wrong, the membrane is inconsistent, or movement joints are ignored, the bathroom may still look complete on day one while quietly failing underneath.
That is why experienced tilers and waterproofers treat shower construction as a system rather than a cosmetic finish. Substrate condition, drainage design, membrane choice, tile selection and finishing details all need to work together.
Start with substrate preparation, not tile choice
Most shower issues begin before a single tile is opened. If the base is uneven, weak, damp, or contaminated, the waterproofing layer cannot perform as intended. Preparation has to be exact.
In practical terms, that means checking the condition of the floor and wall substrates, correcting out-of-level areas, and making sure the surface is suitable for the waterproofing system being specified. Screeding or re-levelling may be required to establish clean falls to the waste. Any cracks, movement, or damage should be addressed before membrane application starts.
This is also where many renovations go wrong. Existing bathrooms often hide legacy issues – loose sheeting, poor patching, failed corners, or uneven floors from previous works. Tiling over that to save time usually costs more later. A premium result depends on stripping the process back to a sound base and rebuilding properly.
Getting the falls right
Water needs to move quickly and predictably to the drain. If the shower floor does not fall correctly, water ponds, grout stays wet for longer, and the installation is placed under unnecessary stress.
Larger format tiles can look striking in a bathroom, but they demand more planning in shower areas. Depending on the waste position and tile size, achieving proper falls without awkward lipping or poor drainage can become difficult. In some projects, smaller formats or mosaic sheets on the shower floor produce a cleaner technical outcome, even if the wall tile is larger and more architectural.
That is one of the recurring trade-offs in shower design. The most visually minimal option is not always the most practical one. Good tiling balances design intent with water behaviour.
Choosing the right waterproofing approach
A proper waterproof shower tiling guide must treat waterproofing as a specified system, not a generic coating. Different substrates, shower layouts and project conditions call for different products and detailing methods. What matters is compatibility, coverage, and disciplined application.
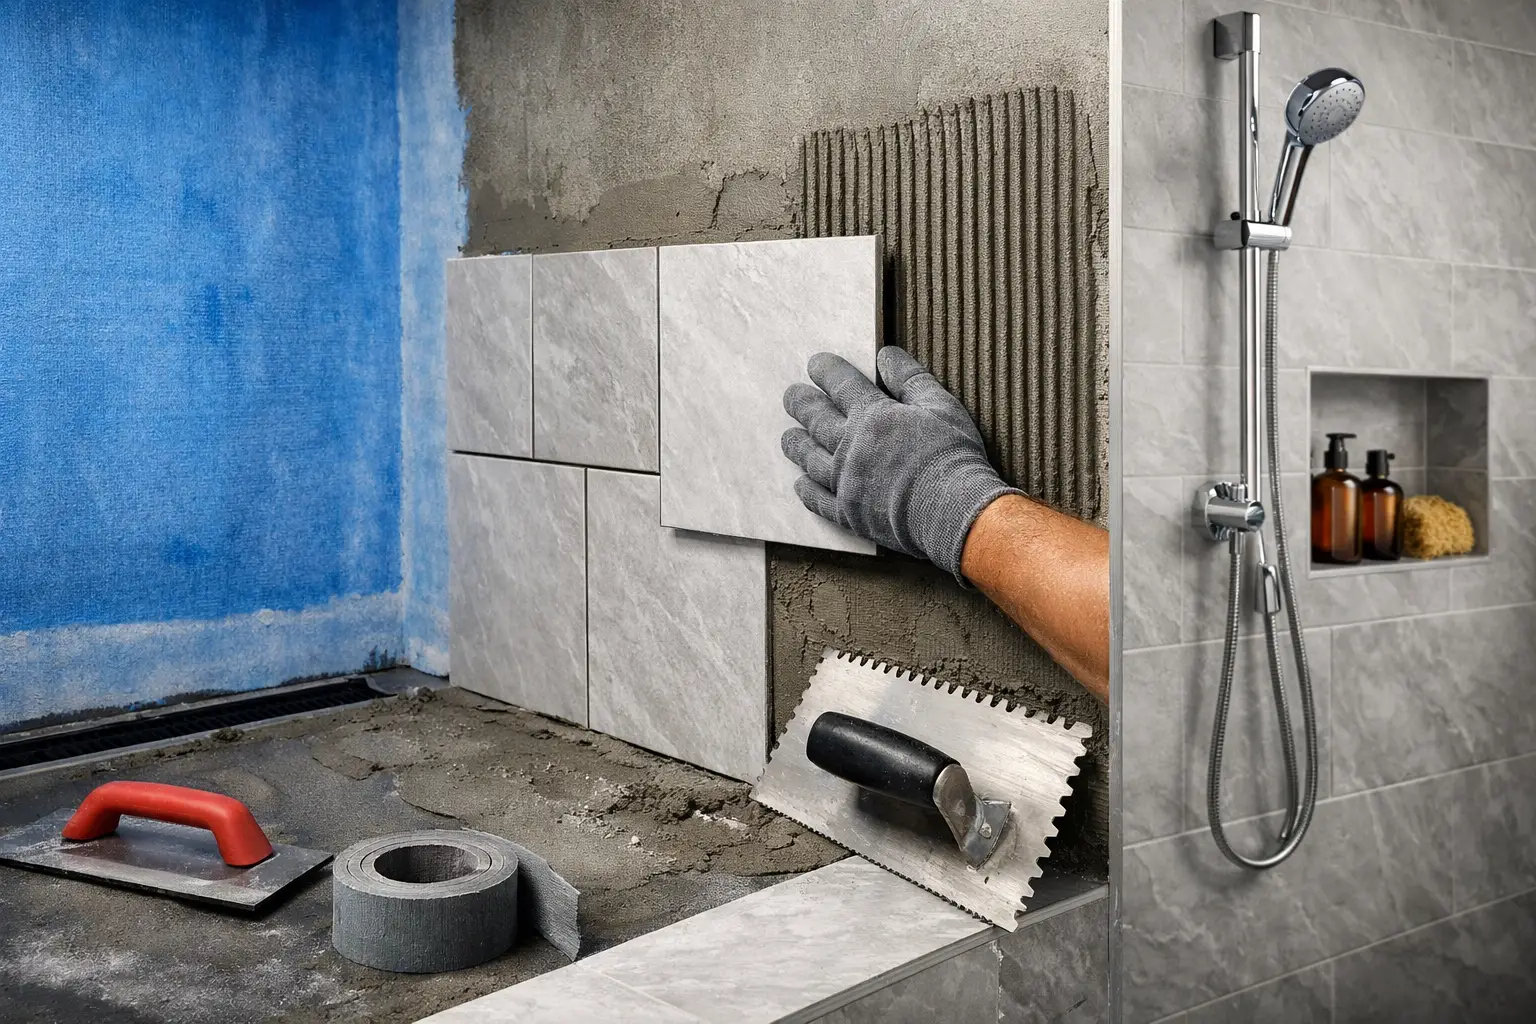
The membrane should be applied only after the substrate is clean, stable and correctly primed where required. Junctions, corners, penetrations, hob details and floor-to-wall transitions need special attention because these are the areas most likely to move or leak. Reinforcement may be needed depending on the system.
Thickness matters as well. Too thin, and the membrane may not perform. Too thick in the wrong areas, and curing or adhesion can be affected. Drying and curing times also need to be respected. Trying to accelerate the programme by tiling too early is one of the fastest ways to compromise the entire assembly.
For builders managing multiple wet areas, consistency is just as important as compliance. It is not enough for one ensuite to be excellent if the rest of the units vary from bathroom to bathroom. A repeatable process, clear sequencing and quality control are what protect multi-unit delivery.
Don’t overlook penetrations and junctions
Mixer bodies, shower outlets, niches, benches and screens all interrupt the waterproof envelope. Each one needs careful detailing. A shower can have immaculate tile lines and still leak through a poorly sealed penetration.
Niches are a common example. They add visual interest and convenience, but they create extra internal corners and horizontal surfaces where water can sit. That does not mean they should be avoided. It means they need proper falls, clean membrane detailing, and precise tiling so water sheds rather than lingers.
Tile selection affects waterproofing performance
Tiles are not the waterproofing layer, but they still influence how well the shower performs over time. Porcelain is a popular choice for good reason. It is dense, durable and well suited to wet areas. Natural stone can be beautiful, though it generally requires more care and a more considered maintenance plan.
Tile size, finish and edge profile all matter. Highly textured tiles can improve slip resistance underfoot, but they may hold more residue and require more cleaning. Very large tiles reduce grout lines, which can create a sleek appearance, yet they can complicate falls and drainage in smaller shower trays.
Grout choice also deserves more attention than it usually gets. The right grout helps with stain resistance, durability and maintenance, but it does not replace the membrane below. A common mistake is assuming that premium grout makes the installation waterproof by itself. It does not. It is one part of a broader assembly.
Installation quality is where the system holds or fails
Once waterproofing is complete, tile installation still needs to be handled with control. Adhesive selection should suit the substrate, tile type and wet area conditions. Coverage needs to be sufficient, especially in shower zones where voids behind tiles can create weak points.
Set-out is not just an aesthetic decision either. Balanced tile layouts help avoid awkward cuts in corners, but they also reduce the chance of compromised detailing around wastes, angles and fittings. This is where experienced installers separate a standard bathroom from a polished one. Precision shows in the lines you notice and the technical details you never have to think about again.
Movement joints and junction sealants are another area where shortcuts become expensive. Bathrooms expand and contract with moisture and temperature changes. If every joint is hard-grouted, stress can build and cracking can follow. Flexible sealants at the right junctions help the tiled surface accommodate movement without breaking the finish.
Frameless screens, linear wastes and other premium details
High-end shower design often includes features that demand tighter execution. Frameless screens rely on accurate levels and tidy junctions. Linear wastes can deliver a sleek, contemporary look, but they require precise falls and clean integration with the tile module. Mitred edges, recessed shelves and oversized feature tiles all raise the visual standard – and the installation risk if handled poorly.
These features are worth doing when they are detailed properly. They simply leave less room for approximation.
Common mistakes this waterproof shower tiling guide can help you avoid
The most frequent problems are not dramatic. They are usually small lapses that stack up. Incomplete preparation, incorrect falls, rushed membrane curing, poor penetration detailing, and weak finishing at corners are the usual culprits.
Another mistake is splitting responsibility without clear coordination. If one trade prepares the substrate, another applies the membrane, and another lays the tile, quality can drift unless the handover between stages is closely managed. End-to-end accountability tends to produce a better outcome because the whole system is being protected, not just individual tasks.
For commercial fit-outs and multi-residential projects, programme pressure can introduce another layer of risk. Fast turnaround matters, but wet area work still needs sequencing discipline. The best contractors know how to maintain pace without treating waterproofing and curing times as optional.
What to ask before shower tiling begins
Before work starts, ask how the substrate will be prepared, how the falls will be formed, what waterproofing system is being used, and who is responsible for each stage. Ask how corners, penetrations, niches and screen junctions will be detailed. If the answers are vague, that is useful information.
You should also ask how the finished shower will be checked before handover. A quality-focused installer will be comfortable talking through process, tolerances, and finish expectations. Confidence in this trade should come from method, not sales language.
For clients investing in a premium bathroom, that clarity matters. The visual payoff is obvious, but the real value sits in the quiet reliability of the room years later.
A shower should feel effortless to use and uncompromising in finish. That only happens when waterproofing, preparation and tiling are treated with the same level of care – because lasting craftsmanship starts long before the final tile is polished.