Level an Uneven Floor Before You Tile
A beautiful tile layout can be ruined before the first tile is even set. If the floor has a dip by the doorway, a ridge down the centre, or a patch that flexes underfoot, the tiling will broadcast it – lipping at the edges, awkward grout joints, and a surface that never quite feels premium. Levelling is not the glamorous part of the job, but it is the part that protects everything you are paying for.
Why uneven floors show up fast in tile work
Tiles are unforgiving. Unlike vinyl, they do not quietly follow a wavy substrate. Large format tiles are even less tolerant because the edges span bigger distances, so a small hump becomes a visible step. Add modern lighting – downlights, window glare, feature LEDs – and you will see shadows where the floor is not flat.
There is also a performance angle. Hollow spots can lead to cracked grout, cracked tiles, or tiles that sound drummy when you walk across them. In wet areas, poor levels can fight your drainage plan, leaving water to sit where it should not.
First, decide what “level” actually needs to mean
Clients often ask for a “perfectly level” floor, but the correct target depends on the room.
In living areas and most commercial spaces, you want flatness rather than a deliberate fall. Flatness is what stops lipping and makes the finished floor feel crisp. In bathrooms, balconies, and other wet zones, you may need controlled falls to a drain or threshold. The goal is still a plane you can tile cleanly – just one that intentionally slopes.
If you are replacing existing tiles, do not assume the old levels were right. Many floors have been tiled over poor prep for years, and you only notice when the new design demands cleaner lines.
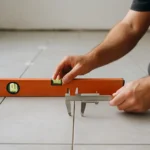
How to check the floor properly (and what to record)
Start with measurement, not guesswork. A long straightedge (around 2m) and a spirit level will show you where the floor is high or low. Move the straightedge in a grid and mark highs and lows directly on the floor with pencil or chalk.
If you are dealing with a wet area, identify where the drain is meant to be and check whether the existing substrate already has a fall. A laser level can help map heights across the room, especially in larger commercial spaces.
When you are measuring, pay attention to three things: the deepest dip, the highest hump, and any movement or softness underfoot. A floor that flexes is not a levelling-compound problem – it is a structural or substrate issue that needs to be resolved first.
Know your substrate before you pick a levelling method
Levelling an uneven floor for tiling always starts with what you are bonding to.
Concrete slabs often have trowel marks, shrinkage cracks, and localised humps where services were patched. Timber floors can be uneven from joist variation, moisture movement, or older boards that have cupped. Existing tiles may be sound but out of plane, or they may be poorly bonded and ready to lift.
Each substrate changes the approach because it changes what “stable” means. You can level over concrete very successfully, but timber typically needs stiffening and an appropriate tile underlay system to control movement.
How to level an uneven floor for tiling: choosing the right approach
There is no single product that fixes every floor. The right solution is the one that produces a stable, tile-ready surface within your height constraints, drying time, and performance needs.
When grinding or scabbling is the smartest first step
If the floor is high rather than low, adding compound simply raises the whole build-up. That can create headaches at door clearances, thresholds, cabinetry kickers, and shower screens.
For concrete, mechanical grinding can take down ridges and remove contaminants that would weaken adhesion. It is dusty work without proper extraction, but it is often the cleanest way to correct a hump without compromising finished heights.
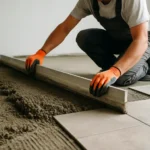
When a self-levelling compound makes sense
Self-levelling compounds are ideal for shallow dips, general waviness, and preparing a surface for large format tiles. They flow to create a flatter plane, but only if the substrate is properly primed and the compound is mixed and placed correctly.
There are trade-offs. Self-levellers have minimum and maximum thicknesses, and they are not designed to bridge movement. They also demand discipline with timing – mix ratios, working time, and temperature all affect the finish. If you rush or overwater the mix, you can end up with a soft, dusty layer that needs to be removed and done again.
When a screed is the right call
For bigger corrections, especially where you need to set falls in wet areas, a screed system is often the better option. A sand-and-cement screed can be shaped accurately to drains, thresholds, and edges, and it can handle thicker build-ups than many self-levellers.
Screeding is craftsmanship work. Getting the falls right is one part; achieving a surface that is dense, sound, and ready for waterproofing or tiling is another. Drying time also matters. If the programme is tight, you may need a rapid-drying screed system to avoid trapping moisture under tiles.
When patching and feather finishing is enough
Some floors are mostly fine but have isolated chases, service patches, or small divots from demolition. In those cases, patch repair compounds and feather finish products can tidy the surface without a full pour.
The risk is missing the bigger picture. A few patches can hide a general slope you did not intend, so measure first and patch second.
The prep steps that separate a premium result from a quick fix
Levelling products do not forgive poor preparation. If you want tiles that sit crisp with tight, consistent grout lines, you need a substrate that is clean, stable, and correctly primed.
Start by removing all contaminants: paint, adhesive residue, curing compounds, grease, and dusty laitance on concrete. On old slabs, this usually means mechanical preparation.
Cracks need judgement. Hairline shrinkage cracks might be manageable with the right crack isolation approach, but active cracks that open and close are a warning sign. Bridging them with compound may simply move the crack line up into your tiles.
Priming is not optional. Primers control suction, improve bond, and help levellers flow as designed. The wrong primer – or skipping it – is a common reason levelling layers debond.
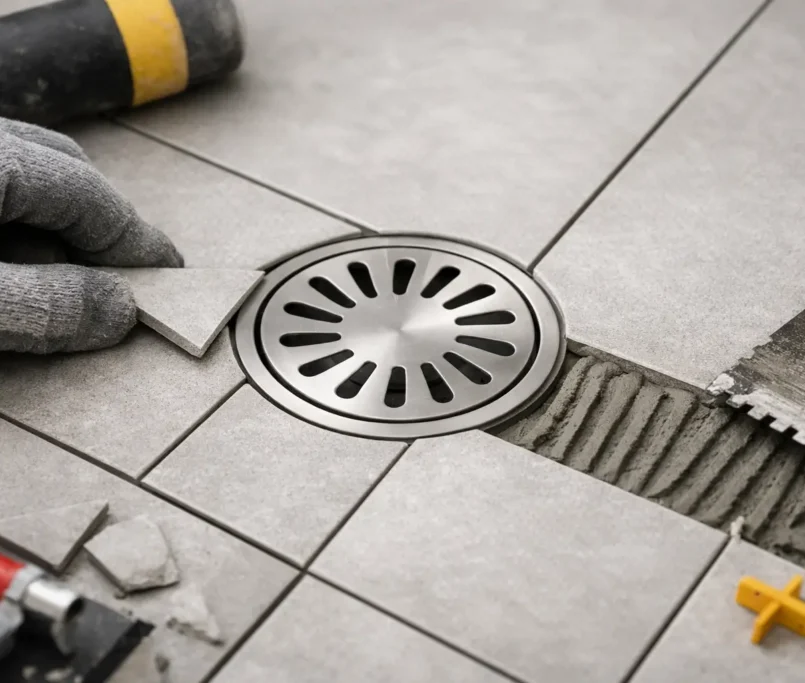
Wet areas: falls, waterproofing, and why sequencing matters
Bathrooms, laundries, and balconies require careful coordination between levelling, falls, and waterproofing. If you level the floor dead flat and then try to “make the fall” with tile adhesive, you are relying on an inconsistent bed thickness. That increases lipping risk and can compromise drainage.
A cleaner approach is to build the fall into the substrate with screed or formed levelling, then waterproof to that shape, and then tile. This sequencing protects the waterproofing system and makes tile installation more precise.
Also consider thresholds. If you are transitioning to timber or carpet outside the wet area, you may need to manage build-up so the finished heights meet neatly. That planning happens at levelling stage, not on the day the tiles arrive.
Timber floors: levelling is only half the story
If your floor is timber, unevenness is often a symptom of movement. Before any levelling, confirm the structure is suitable for tiles: joist spacing, deflection, and sheet thickness matter.
Levelling compounds can be used over appropriate tile underlay boards or prepared sheet substrates, but they do not replace stiffness. If the floor flexes, tiles and grout will suffer. Sometimes the best “levelling” is strengthening the floor and installing a suitable underlay system, then using a smoothing compound for fine tolerance.
Height constraints and edges: where projects get tricky
Many levelling decisions are driven by edges. Door clearances, balcony door tracks, stair nosings, kitchen island plinths, and existing skirting lines can all limit how much build-up you can add.
If you need to raise the floor significantly, you may also need to think about transitions so the finished job looks intentional rather than patched. A premium floor is not only flat, it finishes cleanly at every boundary.
When it’s smarter to bring in a tiling contractor
If you are managing a renovation or a commercial fit-out, levelling is one of those stages where mistakes are expensive. Materials are one cost; time, rework, and programme delays are usually bigger.
A specialist tiling contractor can assess substrate condition, specify the right levelling or screeding approach, and coordinate wet-area falls and waterproofing so the finished floor performs as well as it looks. If you want that kind of end-to-end accountability, Perfectly Laid approaches preparation and levelling as part of precision tiling, not as an afterthought.
The detail that makes the tiles look “set” rather than “stuck on”
Once the floor is levelled, respect curing times. Rushing onto a levelling layer that is still releasing moisture can weaken the bond and create future failures. Equally, leaving a levelling surface exposed too long on a dusty site can mean extra cleaning and repriming before tiling.
Aim for consistency. Flatness, controlled falls where required, clean edges, and a stable substrate are what allow a tiler to keep joints even, minimise lipping, and deliver that sharp, high-end finish that reads as intentional the moment you step into the room.
A helpful way to think about levelling is this: you are not fixing a floor, you are setting the stage. When the stage is right, the tile work can be exquisite – and it will stay that way.