Tile Screeding Process Explained Properly
A tiled floor only looks effortless when the groundwork is exact. If you have ever seen lipping, ponding water, cracked grout lines or hollow-sounding tiles, the problem often started well before the first tile was laid. This tile screeding process explained article sets out what really happens beneath the surface, and why a refined result depends on disciplined preparation rather than quick fixes.
For homeowners, that means fewer defects and a cleaner finish. For builders and project managers, it means predictable levels, smoother sequencing and less remedial work later. Screeding is not the glamorous part of tiling, but it is where a premium installation earns its longevity.
What screeding is actually doing
Screeding is the process of creating a level, stable and properly graded base for tiles. It corrects uneven substrates, establishes falls where drainage matters, and gives the tiler a controlled surface to work from. In wet areas, balconies, alfresco spaces and commercial floors, that control is critical.
A screed is not there to hide every structural issue. If the slab has movement, contamination, significant cracking or moisture problems, those must be addressed first. Good screeding improves the tile bed. It does not replace proper substrate diagnosis.
The exact screed build-up depends on the site conditions, the tile type, the traffic load and the finish expected. A high-end bathroom renovation has different tolerances from a plant room or a large-format retail fit-out. The process is consistent, but the specification is never one-size-fits-all.
Tile screeding process explained step by step
The first step is assessment. Before any mix is prepared, the existing substrate is checked for level variation, strength, cleanliness, cracking and moisture. On a renovation, this may also involve demolition residue, old adhesive removal and re-levelling after previous finishes are stripped out. On a new build, it may involve checking that the slab has been formed within realistic tolerances rather than assuming it is ready to receive tiles.
Once the substrate is assessed, levels are established. This is where experience shows. Finished floor heights need to work with thresholds, drainage points, adjoining materials, cabinetry, fixtures and door clearances. In wet areas, falls must be planned so water moves efficiently to the waste without creating awkward tile cuts or visible dips. On larger commercial jobs, consistency across repeated units becomes just as important as the individual room itself.
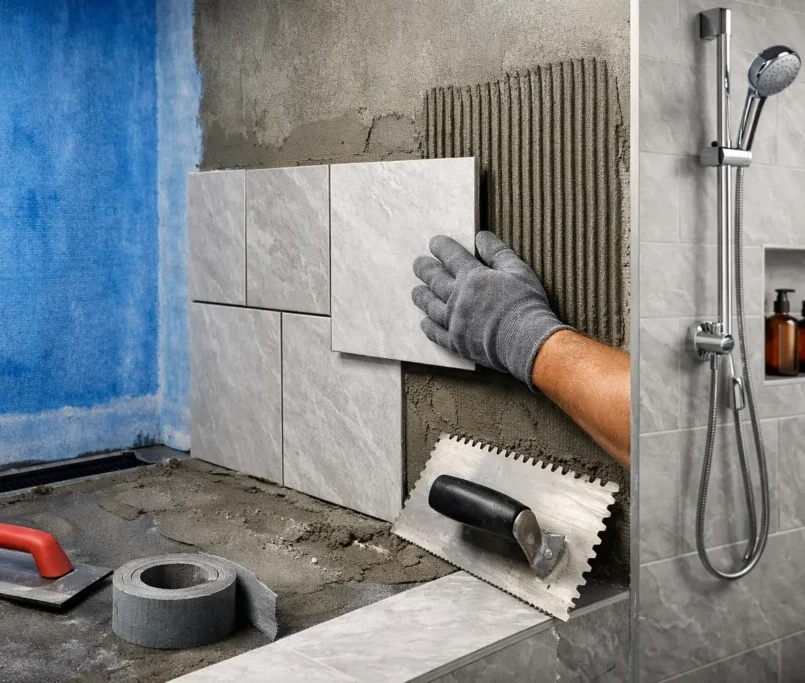
The surface is then prepared properly. Dust, laitance, oil, paint, loose material and contaminants are removed so the screed can bond as intended. Depending on the substrate and system, a primer or bonding aid may be required. Skipping this stage is one of the fastest ways to compromise the whole assembly.
After preparation, screed guides or levelling references are set. These act as control points for the finished plane and, where needed, for the required falls. Without accurate guides, the screed can only be as good as the eye of the installer on the day. Precision work relies on measured reference points, not guesswork.
The screed mix is then applied and compacted. The material may vary depending on specification, but the aim remains the same: create a dense, consistent layer with the right height, plane and drainage profile. The screed is ruled off to the guides, then refined to remove highs, hollows and weak spots. In wet areas, this is where the correct fall is physically formed, and there is little room for error. Too flat and water sits. Too steep and the floor feels awkward underfoot, with more risk of tile lipping.
Once laid, the screed must cure correctly. This stage is often underestimated because the floor can appear ready before it actually is. Tiling too early can trap moisture, affect adhesive performance and lead to movement or debonding later. Programme pressure is real, especially on fast-moving residential and multi-unit projects, but cure times should be managed, not ignored.
Why levels and falls matter so much
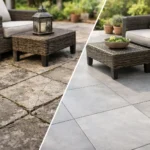
A beautifully selected tile cannot compensate for a poor base. Large-format tiles, in particular, are unforgiving. Any deviation in the substrate becomes visible through lipping, uneven joints and compromised reflections under light. In premium interiors, these defects stand out immediately.
In bathrooms, laundries and external areas, falls are just as important as flatness. Water must travel where it is intended to go. That sounds simple, yet many failures come from screeds that are technically laid but poorly graded. Water pooling near shower screens, doorways or balcony edges is not just an aesthetic issue. Over time, it can contribute to staining, deterioration and complaints that should have been prevented at the screeding stage.
There is always a balance to strike. A floor can be laser-conscious in one direction but still need a deliberate fall in another. Achieving both takes planning and control, especially where design ambitions, fixture positions and drainage locations are all competing for space.
Common problems that begin with bad screeding
Most visible tile failures start below the tile line. If the screed is weak, poorly bonded or inconsistent in depth, tiles may sound hollow or crack under load. If levels are rushed, the finished floor may drift at thresholds or fight against cabinetry and joinery. If falls are wrong, drainage problems appear from day one.
Another common issue is trying to correct too much during tile installation itself. Adhesive is not a substitute for a properly formed screed. While minor adjustment is normal, using tile adhesive to compensate for broad level issues usually creates more problems than it solves. Bond performance, curing and finished alignment all suffer.
On commercial and high-rise projects, inconsistency is the bigger risk. One room with minor defects is frustrating. Repeating those same defects across dozens of units becomes expensive and disruptive. That is why process discipline matters so much on scaled delivery.
Where waterproofing fits into the process
In wet areas, screeding and waterproofing must be coordinated carefully. The sequence can vary depending on the system being used, the substrate and the project requirements. What matters is that the assembled floor build-up supports drainage, adhesion and long-term water resistance.
There is no merit in treating screeding and waterproofing as isolated trades with no overlap in thinking. The finish only performs when the entire system is considered together – substrate, falls, membrane, adhesive, tile and sealant. On premium projects, that joined-up approach protects both appearance and durability.
Is every screed the same?
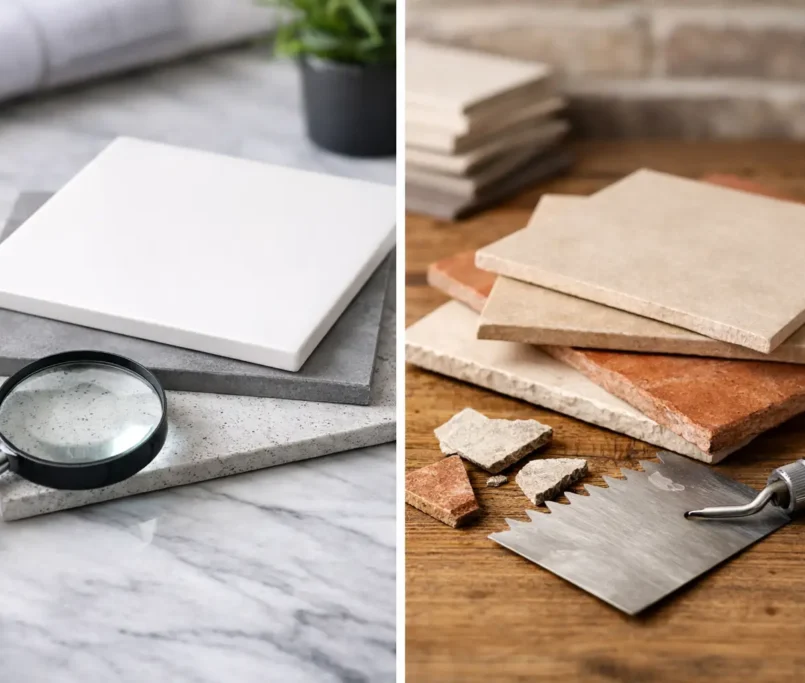
Not at all. Internal dry areas, wet rooms, external entertaining spaces and commercial floors each ask different things of the screed. Thickness, curing profile, strength, bond method and finish tolerance can all vary.
The tile itself also influences the approach. Natural stone, mosaics and large-format porcelain each place different demands on substrate accuracy. The intended use matters too. A residential ensuite and a high-traffic hospitality venue do not operate under the same conditions, even if they appear visually similar once complete.
That is why experienced contractors resist generic advice. The right method depends on the site, the programme and the finish standard being protected.
What clients should expect from a professional screeding process
A professional screeding process should feel controlled from the outset. You should know what is being corrected, what heights are being set, how falls are being handled and when the surface will be ready for the next stage. Clear communication is part of quality.
You should also expect realistic guidance where constraints exist. Sometimes the existing slab, drainage position or threshold level limits what can be achieved without additional works. A good trade partner will explain those trade-offs early rather than disguising them and leaving the defect to appear after handover.
At Perfectly Laid, this is where craftsmanship and accountability meet. Precision is not just about the visual finish on completion day. It starts with the unseen layers that give the tilework its stability, alignment and refinement for years to come.
The value of getting screeding right first time
Screeding rarely gets the attention given to tile selection, grout colour or pattern layout, yet it has more influence over the final result than most clients realise. When it is done properly, the whole installation feels calm and resolved. Lines sit cleanly, water drains correctly, transitions make sense and the floor carries the weight of the design without issue.
When it is done badly, every stage after it becomes more difficult and more compromised. That is why the best tiling outcomes are built, quite literally, from the base up.
If you are planning a renovation, a commercial fit-out or a multi-unit development, treat screeding as a precision trade, not a background task. The floor beneath the tile decides how well the finish above it will live, wear and impress.