Outdoor Patio Tiling Preparation Guide
A patio rarely fails because of the tile you can see. More often, it fails because of the work hidden underneath – the falls that were guessed, the substrate that was left uneven, the movement joints that were skipped, or the waterproofing that was treated as optional. That is why any serious outdoor patio tiling preparation guide starts below the surface. If you want a finish that looks refined on day one and still performs through rain, heat and foot traffic, preparation is the job.
For homeowners, that means protecting the investment in an alfresco space that should feel considered, not patched together. For builders and project managers, it means avoiding the costly cycle of call-backs, ponding water and cracked grout lines. A well-laid patio has visual impact, but its real value is in the precision behind it.
Why outdoor patio tiling preparation matters so much
Exterior tiling works harder than most internal finishes. It deals with temperature shifts, moisture, dirt, direct sun and regular movement in the structure below. Even a beautifully selected tile will look second-rate if the slab holds water or the edges finish awkwardly against doors, drains and adjoining surfaces.
Preparation is where performance and aesthetics meet. The levels need to be right so water moves away cleanly. The substrate needs to be stable enough to support the tile assembly. The waterproofing and movement detailing need to suit the environment, not just satisfy a basic checklist. In high-end work, this stage is also where the finished layout begins to take shape, because set-out, edge alignment and thresholds all depend on what is established early.
The outdoor patio tiling preparation guide: where to start
The first question is simple: what are you tiling over? A concrete slab, an older tiled surface, a screeded area or a repaired base all behave differently. There is no sensible one-size-fits-all approach here. What works on a new, well-cured slab may be completely wrong for a patio with cracking, previous coatings or inconsistent falls.
A proper assessment looks at soundness, flatness, moisture behaviour, drainage points, step-downs and adjoining finishes. If the patio connects to internal living areas, the threshold detail becomes especially important. Too high, and the transition looks clumsy or creates a trip point. Too low, and you can compromise drainage or weather protection. These are not finishing details to solve at the end. They belong in preparation.
Checking the substrate properly
A substrate should be structurally sound, clean and suitable for bonding. That means removing contaminants such as paint, curing compounds, dust, grease or loose material. It also means being honest about defects. Hairline cracks may be manageable depending on their cause and movement profile, but active cracking, hollow sections or drummy areas usually point to a more serious issue.
Flatness matters just as much as strength. Outdoor tiles, particularly larger format porcelain, highlight unevenness very quickly. Lipping becomes more obvious, drainage becomes less predictable and the final look loses that crisp, premium finish clients expect. If the slab is out, the answer is not to hide it with adhesive. Re-levelling, patching or screeding may be needed to create a proper base.
Getting the falls right
Water should leave the surface efficiently and predictably. That sounds obvious, yet poor falls remain one of the most common failures in patio tiling. When levels are guessed rather than set out with care, you end up with ponding in the middle of the space, water tracking back towards the house or awkward low spots near drains.
Correct falls depend on the patio layout, tile size, threshold heights and drainage points. Sometimes a slab can be corrected with screed. Sometimes the existing levels are so compromised that more extensive rectification is the sensible path. The trade-off is cost upfront versus performance later. Cutting corners here nearly always becomes more expensive once the space is tiled.
Drainage, thresholds and edge detailing
An outdoor patio does not perform in isolation. It connects to doors, garden beds, pools, retaining edges and often covered alfresco zones. Good preparation accounts for all of these junctions because they shape how water behaves and how the finished surface reads visually.
Drainage needs to be designed into the tile build-up, not treated as an afterthought. Linear drains can create a cleaner visual line, but only if the levels are planned accurately. Point drains may suit some layouts, though they often require more complex falls. Edge detailing matters too. Exposed perimeters, stair nosings and transitions to other materials need to be clean, durable and appropriate for external use.
Thresholds deserve particular care. At sliding or bi-fold doors, the relationship between internal floor height and the patio surface can make or break the project. The goal is a result that feels elegant and intentional while still protecting the building envelope.
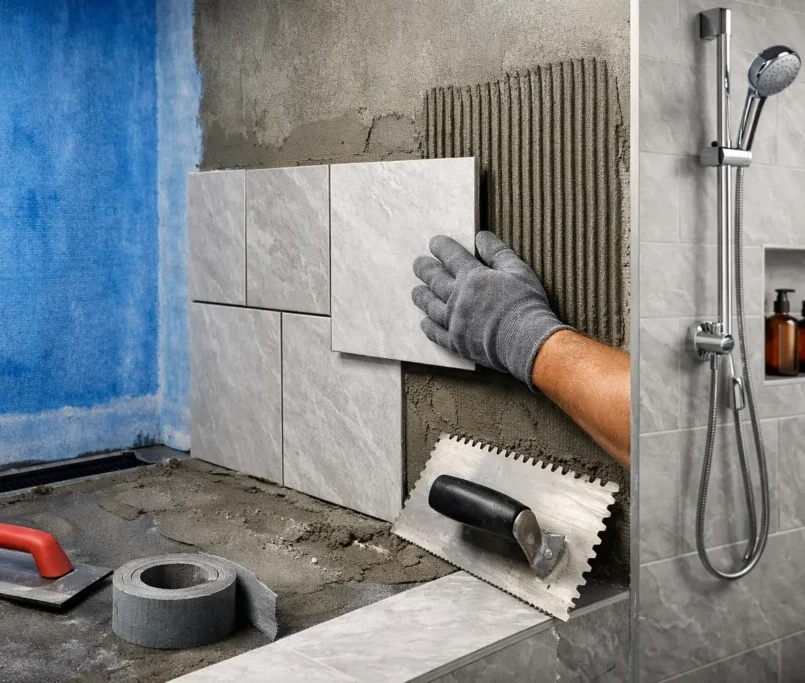
Waterproofing is not always optional
In some patio builds, especially those over occupied spaces, balconies, podiums or suspended slabs, waterproofing is critical. In others, the assembly may rely more heavily on drainage design and substrate condition. This is where experience matters, because the right specification depends on the construction beneath the tile and the risk profile of the area.
A surface that sits over habitable rooms needs a far more disciplined approach than a simple ground-level slab. Membrane selection, detailing at upturns and penetrations, and compatibility with adhesives all need to be considered together. A premium tile finish is only as dependable as the system supporting it.
Movement joints are part of the design
Many outdoor failures are blamed on grout or adhesive, when the real issue is the absence of movement accommodation. External tiled areas expand and contract. Without properly placed movement joints, that stress has to go somewhere.
The cleanest installations plan movement joints into the set-out so they are functional without disrupting the look of the space. This is a detail-led exercise, especially in larger patios or commercial outdoor zones where consistency matters across a wide area. If you are aiming for visual refinement, movement planning should be handled early, not forced into the layout once tiling begins.
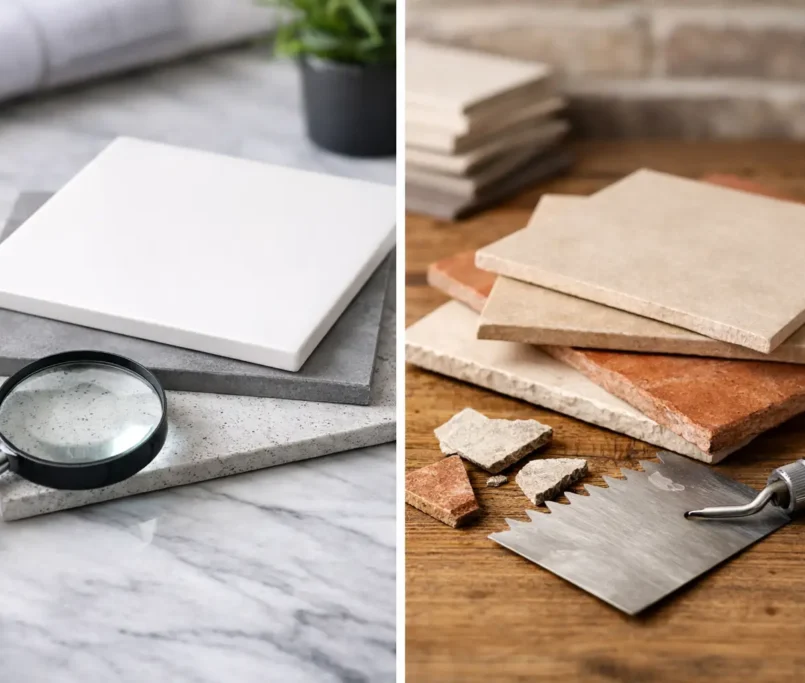
Tile selection affects preparation more than people expect
Not all patio tiles place the same demands on the substrate. Large format tiles require tighter tolerances. Natural stone may bring additional sealing or substrate considerations. Thick external porcelain can offer excellent durability, but it still depends on the quality of the bed and bond beneath it.
Slip resistance also matters, though it should be balanced with maintenance and visual finish. A heavily textured tile may improve grip in wet conditions but collect more dirt and be harder to clean. A smoother finish may look more refined in some settings but be less suitable around pools or exposed weather zones. Preparation needs to respond to the tile choice, because build-up, adhesives, joint widths and tolerances all shift accordingly.
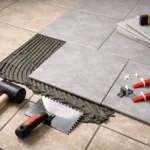
What a professional preparation process usually includes
A high-standard preparation scope often begins with demolition or surface stripping where required, followed by substrate repair and cleaning. From there, levels are checked, falls are established or corrected, and any screeding or re-levelling work is completed. If waterproofing is needed, it is applied as part of a coordinated system rather than as a stand-alone task. Only then does the tile installation phase truly make sense.
That end-to-end approach is what protects the finished result. It also creates better programme control. Builders and developers know that fragmented responsibility causes problems – one contractor blames the slab, another blames the membrane, another blames the tile. A disciplined process reduces those gaps and keeps accountability clear.
For clients seeking a more elevated finish, this matters just as much aesthetically as technically. Sharp lines, even joints, consistent levels and refined transitions are not accidental. They are the visible outcome of careful preparation.
Common mistakes that undermine a patio before tiling starts
The most common issues are rushing onto green concrete, tiling over an unsound or contaminated surface, ignoring falls, underestimating movement, and trying to correct poor levels with adhesive alone. Another frequent mistake is choosing a tile before confirming whether the substrate and drainage design can support that look properly.
There is also a tendency to focus on the tile as the hero product, when the real success of the patio depends on the assembly underneath. Premium materials do not rescue poor groundwork. They simply make the flaws more expensive.
When preparation needs a more tailored approach
Some projects are straightforward. Others involve older slabs, multi-level outdoor areas, structural interfaces, commercial usage demands or tight design tolerances. In those cases, preparation should be tailored to the actual site conditions, not copied from a standard internal tiling method.
That is especially true where visual continuity matters – for example, when an alfresco area extends from a carefully designed interior, or where a development needs the same quality benchmark carried across multiple units. Perfectly Laid approaches these jobs with the understanding that outdoor tiling is not just surface work. It is a precision trade that protects both design intent and long-term performance.
The best patio finishes always look calm and effortless. Underneath, they are anything but. They are measured, corrected, detailed and planned with care – and that is exactly where a lasting outdoor space begins.