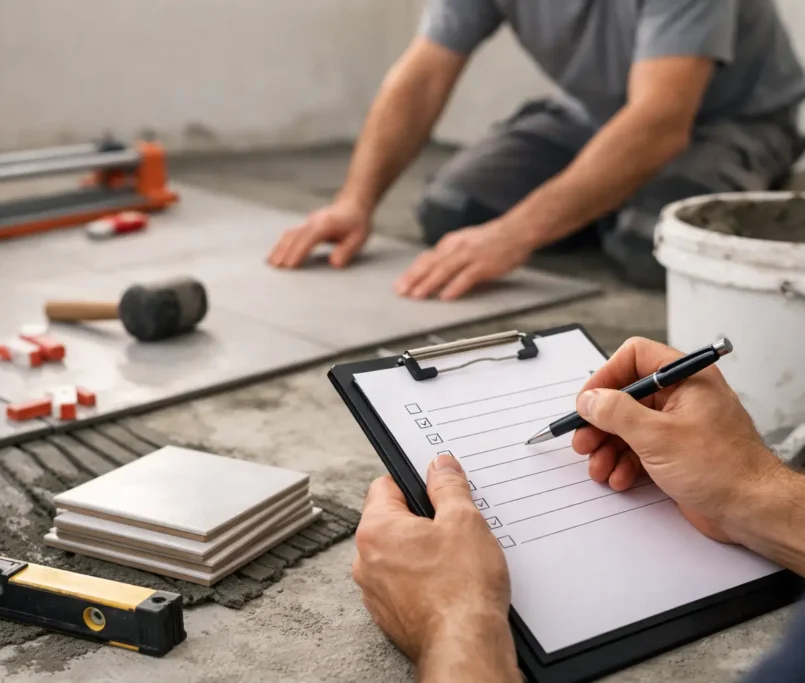
Tile Installation Quality Checklist
A tiled surface can look impressive on day one and still be heading for failure. The giveaway is rarely the tile itself. It is the preparation underneath, the discipline during installation, and the finishing details that decide whether the result feels crisp, durable and genuinely high end. That is why a proper tile installation quality checklist matters – not as paperwork for its own sake, but as a way to protect the visual standard and long-term performance of the space.
For homeowners, that might mean avoiding lippage across a feature floor or cracked grout in a new bathroom. For builders and project managers, it means fewer defects, cleaner handovers and consistent workmanship across every lot or unit. The checklist below focuses on what quality actually looks like on site.
Why a tile installation quality checklist matters
Tiling sits at the intersection of design and construction. Clients notice the lines, symmetry and finish immediately, but the installation also has to cope with moisture, movement, cleaning regimes, foot traffic and time. A beautiful tile selection cannot compensate for poor substrate preparation or rushed waterproofing.
That is where many projects drift off course. The visible layer gets attention, while the hidden work is treated as routine. In reality, surface correction, falls, screeding, bonding, movement allowances and sealant detailing are where premium outcomes are protected. A quality checklist keeps the standard measurable rather than subjective.
Before tiling starts: check the foundation
The first stage is the one most often underestimated. If the substrate is out of level, unstable, contaminated or not suited to the tile type, the finish will always be compromised. A skilled installer checks whether the base is sound, clean and prepared for adhesion before a single tile is laid.
Floors should be assessed for flatness, level and required falls. Walls should be checked for plumb and plane. If correction is needed, it should happen before installation through demolition, re-levelling or screeding rather than trying to hide problems with adhesive. That shortcut nearly always shows up later in uneven lines or hollow-sounding tiles.
In wet areas, waterproofing should never be treated as a quick precursor to tiling. The membrane must be suitable for the environment, correctly applied and allowed to cure in line with system requirements. If penetrations, junctions and corners are not detailed properly, the risk is not cosmetic – it is structural and expensive.
Material and layout checks
Quality starts before fixing begins. Tiles should be checked for batch consistency, shade variation, sizing and visible defects. This matters even more with stone-look porcelain, large-format pieces and decorative feature tiles, where blending and placement affect the final appearance.
Layout planning is equally important. A strong installation rarely happens by accident. The set-out should consider centring, symmetry, focal points, transitions, doorways, drains and cuts at edges. In premium spaces, awkward slivers and inconsistent margins stand out immediately.
There is no single perfect layout for every project. A bathroom renovation might prioritise balanced cuts around a niche and tapware. A commercial fit-out may prioritise alignment through thresholds and high-traffic zones. The right approach depends on how the space is used and what the eye will notice first.
Tile installation quality checklist for the fixing stage
Once installation begins, consistency is everything. Adhesive should be appropriate to the substrate, tile type and application. Large-format tiles, external areas and wet zones often require more stringent product selection and installation technique than a standard internal wall.
Coverage matters. Adhesive should provide sufficient contact to support the tile properly, especially in wet areas and on floors. Voids beneath tiles can lead to drummy spots, cracked corners and reduced durability. On a quality project, fixing is deliberate, not rushed.
Joint spacing should be consistent across the field. Even slight irregularity in grout lines can disrupt the whole finish, particularly with rectified tiles where the expectation is sharper visual control. Spacing also needs to suit the tile and setting. Pushing joints too tight for appearance can create trouble where movement needs to be managed.
Lippage should be monitored closely. Some tile types and patterns make minor variation more noticeable, and some level of tolerance depends on the tile itself, but a premium finish should feel intentional underfoot and read cleanly across reflected light. Uneven edges are not just a visual problem – they can affect safety and wear over time.
Waterproofing, falls and movement are not optional details
In bathrooms, laundries, balconies and alfresco spaces, quality is measured as much by performance as appearance. Falls should direct water effectively to wastes without birdbaths or flat spots. If water sits where it should drain, the installation has missed a core functional requirement.
Movement joints and flexible sealant are another area where corners are often cut. Tile and substrate movement is normal. The question is whether the installation has been detailed to accommodate it. Junctions between walls and floors, changes in plane, perimeter edges and larger expanses should be treated correctly to reduce the risk of cracking and debonding.
This is one of the clearest differences between basic labour and disciplined trade execution. Good tiling is not just about laying straight lines. It is about understanding what the installation will do over the next five to ten years.
Finishing details that separate average from exceptional
The final visual standard is often decided by the last ten per cent of the job. Cuts around fixtures should be neat and well-positioned. Trim selection should suit the design intent and be installed cleanly. Grout colour should support the tile rather than distract from it, and it should be applied evenly without patchiness, pinholes or residue left on the surface.
Caulking deserves particular attention. In quality work, sealant lines are clean, consistent and placed where they belong. Messy, uneven caulking can cheapen an otherwise excellent installation in seconds. The same applies to chipped edges, poorly dressed mitres and untidy transitions between adjoining finishes.
Clean-down is part of workmanship, not an afterthought. A premium project should be handed over free of adhesive smears, grout haze, damaged tiles or avoidable marks. If protection is needed after completion because other trades are still active, that should be organised properly.
What to inspect at handover
A final review should be done in good light and from normal viewing angles, then closer where detailing matters. Look for alignment through the space, consistency in joints, neat edge treatment and a balanced overall layout. In wet areas, check that wastes sit correctly, water flows as intended and sealant has been finished neatly.
It is also worth tapping suspect areas lightly if there are concerns about hollow spots, although this should be interpreted carefully. Not every sound variation indicates failure, and context matters. What matters more is whether the installation presents as secure, even and professionally executed.
For larger developments or multi-unit projects, the checklist should be applied consistently across every area rather than only the display-standard spaces. Reliability at scale is a quality marker in itself. A contractor who can deliver the same finish across repeated bathrooms, kitchens, corridors and outdoor zones protects the programme as well as the brand of the development.
Choosing a contractor who works to a real standard
A checklist is useful, but it cannot replace trade judgement. The best outcomes come from installers who take ownership of the whole tiling scope, from preparation and waterproofing through to final detailing. That reduces the gaps where defects tend to appear.
When reviewing contractors, ask how they handle substrate correction, waterproofing, set-out planning and finishing details, not just tile laying rates. Ask how they manage scheduling, communication and defect prevention. On higher-end residential and commercial work, responsiveness and process discipline are part of the product.
This is where a specialist contractor brings value beyond labour. At Perfectly Laid, the focus is not simply getting tiles on the wall or floor. It is precision execution that protects the design, the programme and the long-term result.
A well-installed tiled surface should feel calm, crisp and enduring. If the lines are true, the drainage works, the details are refined and the finish still looks right after the builders have gone, that is usually the clearest sign the job was done properly.